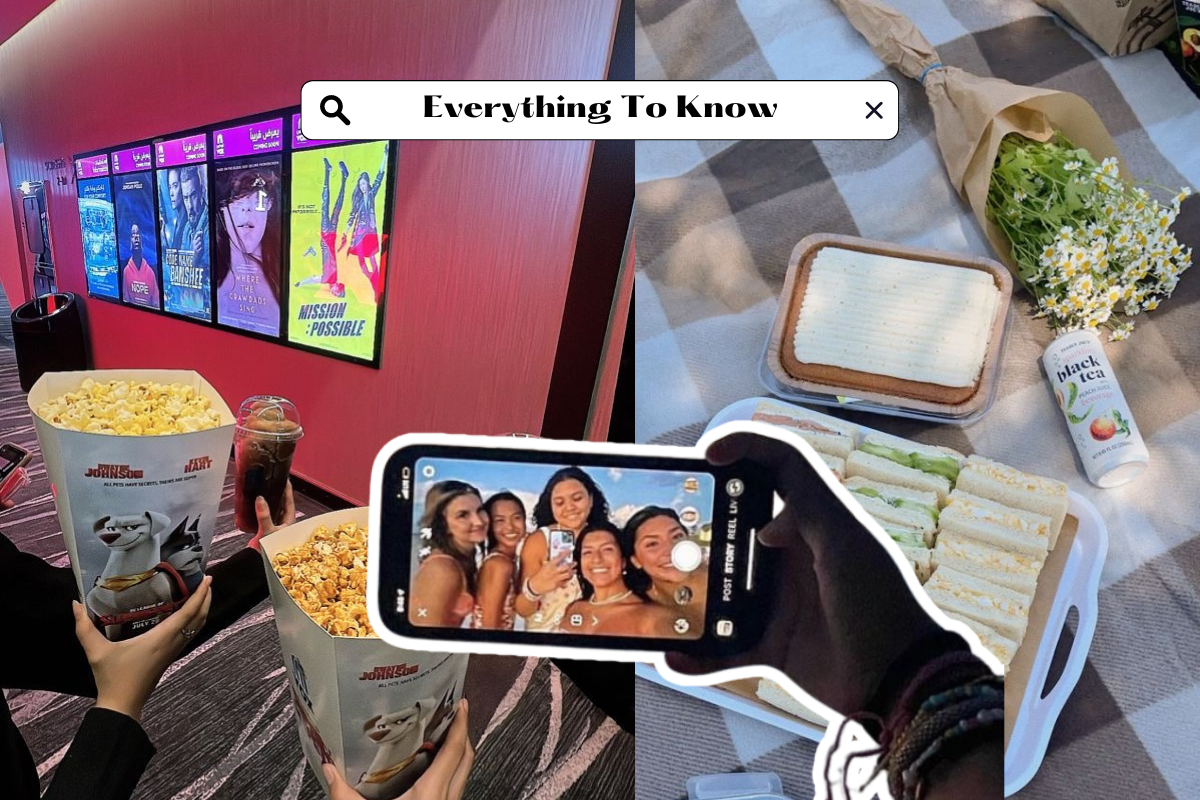
Boredom can strike at any moment, whether you’re home alone or with a friend, in the middle of the night, or during a lazy weekend. But don’t worry, there are countless things to do when bored that can turn a dull moment into an opportunity for fun and creativity. From funny things to do when bored to more aesthetic things to do when bored, this blog post has got you covered. We’ll explore various activities, tips, and ideas to make the most out of your free time. Things to Do at Home with a Friend When Bored Having a friend over and not sure what to do? Here are some things to do at home with a friend when bored: Game Night Turn your boredom into a fun game night. Whether it’s board games, card games, or video games, a little competition can be a great way to bond and have fun. Board Games: Monopoly, Scrabble, Catan Card Games: Poker, Uno, Cards Against Humanity Video Games: Mario Kart, Fortnite, FIFA Movie Marathon Pick a theme or a series and watch movies back-to-back. Some popular choices include: Harry Potter series Marvel Cinematic Universe Classic Disney movies Don’t forget the popcorn and comfy blankets! DIY Projects Get creative with DIY projects. You can make friendship bracelets, paint canvases, or even try your hand at pottery. These activities are not only fun but also leave you with a tangible memory of your time together. Book Club If you and your friend love reading, start a mini book club. Pick a book, read a few chapters, and discuss your thoughts. It’s a great way to connect and dive into interesting conversations. Things to Do at Midnight When You’re Bored Sometimes boredom hits at odd hours, like midnight. Here are some things to do at midnight when you’re bored: Stargazing If you have access to an open space, stargazing can be a calming and beautiful experience. Grab a blanket, lie down, and admire the night sky. You might even catch a shooting star! Midnight Snack Get creative in the kitchen and whip up a midnight snack. Try making something new like homemade ice cream, fancy grilled cheese, or even a full breakfast spread. Watch a Movie Find a cozy spot and watch a movie that matches your midnight mood. Whether it’s a classic thriller, a romantic comedy, or a cult favorite, movies can make the late hours feel special. Write a Short Story Let your imagination run wild and write a short story. It’s a great way to pass the time and unleash your creativity. You might discover a hidden talent! Preppy Things to Do When Bored For those who love the preppy lifestyle, here are some preppy things to do when bored: Organize Your Wardrobe Take the time to organize your clothes. Color-coordinate, fold neatly, and maybe even plan some outfits for the upcoming week. It’s a productive way to spend your time and you’ll feel good seeing everything in order. Tennis or Golf If you have access to a tennis court or golf course, why not play a game? These preppy sports are not only enjoyable but also a great way to get some exercise and fresh air. DIY Crafts Try your hand at preppy DIY crafts like making monogrammed items, personalized stationery, or decorating your planner. These crafts can add a personal touch to your belongings. Read a Classic Novel Dive into a classic novel that embodies the preppy aesthetic. Consider titles like “The Great Gatsby,” “Pride and Prejudice,” or anything by F. Scott Fitzgerald. Funny Things to Do When Bored Laughter is the best medicine, so here are some funny things to do when bored: Prank Calls Make some harmless prank calls to your friends. Make sure to keep it light-hearted and fun, avoiding anything that could hurt feelings or cause real trouble. Silly Challenges Try out silly challenges with your friends or family members. You can do a blindfolded drawing challenge, the whisper challenge, or even try to speak in different accents for a while. Watch Comedy Shows Binge-watch some comedy shows or stand-up specials. Laughter is guaranteed to lift your spirits and chase away boredom. Create a Meme Get creative and make some memes. You can use photos of your friends, family, or even your pets. Share them on social media for everyone to enjoy! Things to Do When Bored at Night Nighttime can be a perfect time to unwind and try something new. Here are some things to do when bored at night: Guided Meditations Relax and clear your mind with guided meditations. There are plenty of apps and online resources to help you find peace and tranquility before bed. Write a Gratitude List Reflect on your day and write a list of things you’re grateful for. It’s a great way to end the day on a positive note and improve your mental health. Listen to a Podcast Find an interesting podcast and listen to a few episodes. Whether it’s true crime, comedy, or self-improvement, podcasts can be both entertaining and informative. Take a Walk If it’s safe and you’re comfortable, take a nighttime walk. The fresh air and quiet surroundings can be very soothing and a good way to reflect on your day. Aesthetic Things to Do When Bored For those who appreciate beauty and creativity, here are some aesthetic things to do when bored: Photography Grab your camera or smartphone and take photos of things around you. Experiment with angles, lighting, and subjects to create beautiful and unique images. Journaling Start a journal and make it as aesthetic as possible. Use different pens, stickers, and washi tape to decorate the pages. Write about your thoughts, dreams, and daily experiences. Interior Decorating Rearrange your room or decorate a space in your home. Add some plants, fairy lights, or art pieces to create a cozy and aesthetically pleasing environment. Crafting Engage in crafting activities like making candles, knitting, or scrapbooking. These activities are not only fun but
How to Use Flash Cards to Study
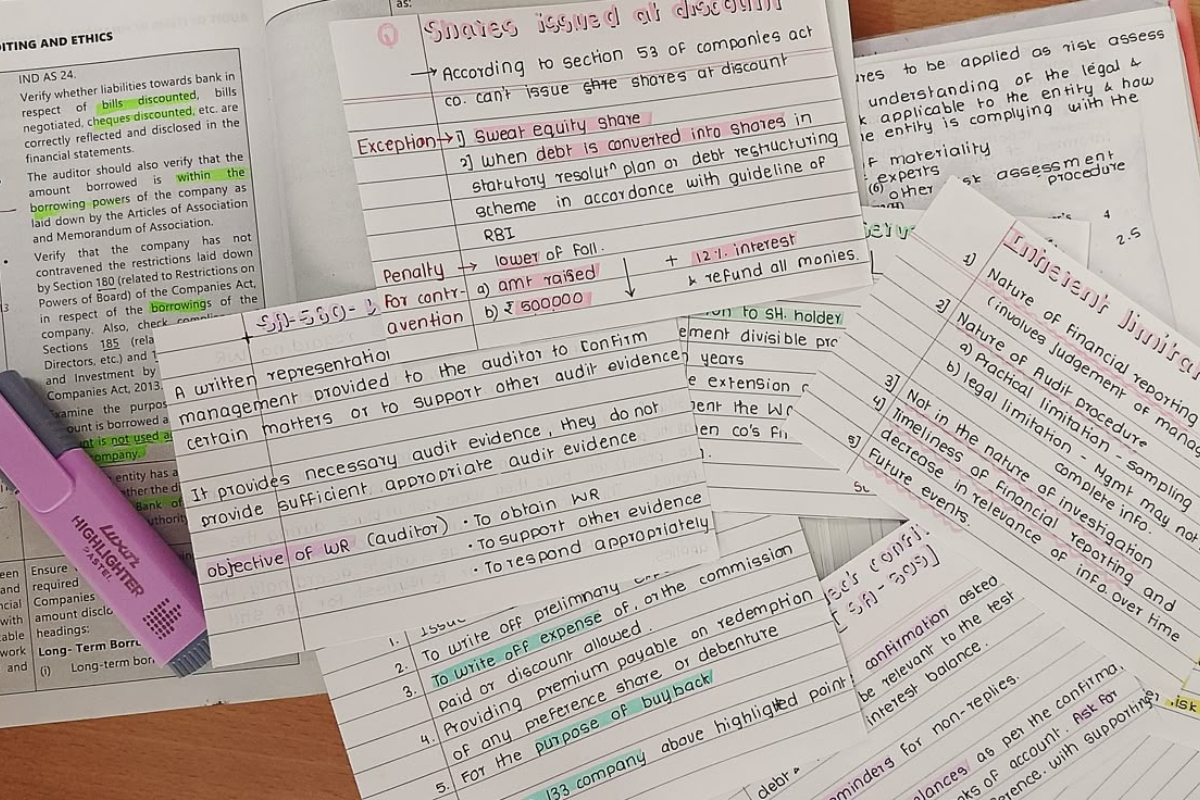
Flash cards are one of the most powerful tools for active learning—and they’re just the beginning. Whether you’re prepping for a big exam, mastering a tricky subject, or trying to boost your overall academic performance, studying effectively is a skill every student needs. In this post, we’ll break down proven strategies, smart tools, and simple techniques to help you study smarter—not harder. You’ll also discover how resources like a Step 2 Study Plan, Multiplication Flash Cards Printable PDF, and Quizlet.com can supercharge your study sessions and support your academic success at any level. Creating an Effective Study Plan One of the first steps to successful studying is to create a study plan. A study plan serves as a roadmap, guiding you through your coursework and helping you allocate your time effectively. Here are some steps to create a robust study plan: Assess Your Goals and Deadlines: Identify your academic goals. Note down all important deadlines for assignments and exams. Break Down Your Study Material: Divide your coursework into manageable chunks. Prioritize topics based on difficulty and importance. Allocate Study Time: Set aside specific times for studying each subject. Ensure you have regular breaks to avoid burnout. Utilize Tools and Resources: Incorporate various tools like study flash cards, online resources, and printable materials to diversify your study methods. Utilizing Study Flash Cards Study flash cards are an effective tool for memorizing information. They are particularly useful for subjects that require rote learning, such as vocabulary, historical dates, and mathematical formulas. Flash cards can be physical or digital, and platforms like Quizlet.com offer a wide array of pre-made flash cards or allow you to create your own. Benefits of Using Study Flash Cards: Active Recall: Flash cards help in actively recalling information, which is more effective than passive review. Spaced Repetition: By reviewing flash cards at spaced intervals, you can improve long-term retention. Versatility: They can be used for a variety of subjects and are easily customizable. To maximize the benefits of flash cards, try the following tips: Keep them concise: Focus on key points to avoid information overload. Use visuals: Incorporate images or diagrams where possible to enhance memory. Shuffle regularly: Regularly shuffle your cards to ensure you’re not just memorizing the order. Printable Resources: Multiplication Flash Cards For students who struggle with multiplication, Multiplication Flash Cards Printable PDF can be a lifesaver. Printable flash cards are convenient and can be used anywhere, making them ideal for quick revision sessions. Here’s how you can make the most out of Multiplication Flash Cards Printable PDF: Print and Cut: Print the PDF and cut out the individual cards. Organize by Difficulty: Arrange the cards in stacks based on difficulty. Daily Practice: Dedicate a few minutes each day to practice. Involve Family: Get family members to quiz you. Leveraging Online Platforms: Quizlet.com Quizlet.com is a versatile online platform that offers a plethora of study tools, including flash cards, games, and quizzes. It’s a great resource for both individual and group study sessions. Features of Quizlet.com: Study Sets: Access thousands of pre-made study sets or create your own. Learn Mode: A mode that adapts to your learning pace, focusing on areas where you need improvement. Match and Gravity Games: Interactive games that make learning fun and engaging. Quizlet Live: A collaborative game for classroom use that encourages team-based learning. Study Modes for Different Learning Styles Different students have different learning styles, and it’s important to find a study mode that works best for you. Here are a few study modes to consider: Visual Learners: Use diagrams, charts, and videos. Create mind maps and infographics. Auditory Learners: Listen to lectures and podcasts. Use apps that convert text to speech. Kinesthetic Learners: Engage in hands-on activities. Use flash cards and physical models. Reading/Writing Learners: Take extensive notes. Summarize information in your own words. Incorporating Technology in Your Study Plan Technology can significantly enhance your study plan. Here’s how you can integrate various technological tools: Digital Note-Taking: Use apps like OneNote or Evernote to organize your notes. Sync across devices for easy access. Online Resources: Utilize educational websites and YouTube channels for supplementary learning. Access interactive simulations and virtual labs. Study Apps: Download apps like Anki for flash cards. Use time management apps like Forest to stay focused. Tips for Staying Motivated Studying can sometimes feel overwhelming, but staying motivated is key to success. Here are some tips to keep you motivated: Set Achievable Goals: Break your study goals into small, manageable tasks. Reward Yourself: Treat yourself after completing a study session. Stay Positive: Maintain a positive attitude and remind yourself of your long-term goals. Join Study Groups: Collaborate with peers to stay motivated and gain new perspectives. Regular Breaks: Take regular breaks to avoid burnout and keep your mind fresh. Conclusion Studying is a skill that can be mastered with the right strategies, tools, and mindset. By creating a comprehensive study plan, utilizing resources like Multiplication Flash Cards Printable PDF and Quizlet.com, and finding the study mode that works best for you, you can significantly enhance your academic performance. Remember to stay motivated, use technology to your advantage, and keep a positive attitude towards learning. For more information and resources, visit Quizlet.com and explore the multitude of tools available to aid in your studying journey. Happy studying! By following these guidelines and utilizing these resources, you’ll be well on your way to academic success. Remember, the key to effective studying is consistency, dedication, and the right tools. Good luck!

100 Pranks To Do on Your Boyfriend Over Text
Text pranks are a fun and harmless way to add a little humor and excitement to your relationship. Whether you’re looking for lighthearted mischief or trying to plan the best April Fools pranks over text, we’ve got you covered. In this ultimate guide, we’ll explore various pranks to do on your boyfriend over text, including funny pranks and clever tricks. Buckle up and get ready to laugh! Funny Autocorrect Pranks 1. Change Your Contact Name to “Pizza Delivery” and Text Him, “Your Large Pineapple Pizza is On Its Way!” Surprise your boyfriend by changing your contact name on his phone to “Pizza Delivery.” Then, send him a text saying, “Your large pineapple pizza is on its way! Enjoy your meal!” Watch his reaction as he tries to figure out what’s going on. Text Example: “Hi! This is your local pizza delivery. Your large pineapple pizza is on the way. It should arrive in 15 minutes. Please have $20 ready for the delivery driver. Thank you!” Tip: Add a pizza emoji to make it even more believable! 2. Send Random Lyrics to a Song Without Context Start sending him random lyrics from a popular song without any context. It will leave him scratching his head and wondering what you’re trying to say. Text Example: “Is this the real life? Is this just fantasy? ” “Caught in a landslide, no escape from reality…” Tip: Choose a well-known song for an even funnier reaction. You could even pick lyrics that seem like you’re trying to send a secret message! 3. Autocorrect Prank: Pretend Your Autocorrect Keeps Changing His Name to Something Silly Pretend that your phone’s autocorrect has gone rogue and keeps changing his name to something absurd like “Cuddle Muffin” or “Pumpkin Spice.” Each time you type his name, correct it and apologize profusely. Text Example: “Hey Snuggle Bear—oops, I mean, babe! My autocorrect is going crazy!” “Can you help me with something, Cuddle Muffin? I mean… babe. Sorry, my phone’s acting up!” Tip: Use an affectionate or funny pet name that he would never expect. 4. Type in All Caps and Act Like Your Caps Lock Is Broken Type all your messages in capital letters and act like your caps lock is stuck. Pretend you’re unable to fix it and keep the conversation going this way. Text Example: “WHY IS MY TEXT SO LOUD? I CAN’T TURN OFF CAPS LOCK!” “CAN YOU STILL HEAR ME? I THINK MY PHONE IS BROKEN!” Tip: Use this prank sparingly, or he might think you’re genuinely upset or yelling. 5. Text Him Backward Sentences and Say It’s a New Communication Challenge Challenge your boyfriend to decode your messages by texting him backward. Tell him it’s a fun new communication challenge you read about online. Text Example: “!od uoy era woH” “.yaw ot nuf a s’tI ,em ees uoy lliw oS” Tip: This can be extra funny if he takes a while to figure out the prank. 6. Use Random Emojis and Ask Him to Decipher Their Meaning Send him a string of random emojis and ask him to decipher what you’re trying to say. When he responds, act like his guesses are way off. Text Example: “” “What do you think this means? It’s super obvious!” Tip: Use a combination of emojis that don’t make any sense together to add to the confusion. 7. Misspell Every Word in a Sentence Intentionally and Act Confused Send him a message with every word misspelled and then pretend you’re confused when he points it out. Insist that it looks correct on your end. Text Example: “Hy, hw r yuo doin tody? I cnt wiat to se yuo!” “Waht do uo men? Loks fin to me!” Tip: Keep the misspellings consistent to make it seem like an actual error. 8. Send Him the Wrong Answers to Questions He Asks and Keep Doing It Whenever he asks a question, give him a completely wrong answer. Keep doing it until he catches on or gets frustrated. Text Example: Boyfriend: “What time are we meeting tonight?” You: “I think it’s Thursday.” Boyfriend: “No, what time?” You: “Blue?” Tip: This prank works best with a series of simple questions where he expects straightforward answers. 9. Pretend You Don’t Understand Slang He’s Using and Ask for a Full Explanation Whenever he uses any slang or abbreviation, pretend you have no idea what it means and ask for a detailed explanation. Text Example: Boyfriend: “LOL, you’re funny.” You: “LOL? What does that mean? Is it some sort of code?” Boyfriend: “Laughing Out Loud.” You: “Oh, why didn’t you just say that?” Tip: This can lead to some hilarious over-explanations, especially if the slang is super common. 10. Act Like You’re Talking to Someone Else and Then Apologize, Saying You Texted the Wrong Person Send a message that clearly isn’t meant for him, then quickly apologize, saying it was meant for someone else. This will definitely grab his attention! Text Example: “Don’t forget to bring the secret weapon to the meeting tonight.” “Sorry! Wrong person. That was meant for my cousin.” Tip: Make the message intriguing but harmless to keep it light-hearted. Silly Scenarios 11. Tell Him You’re Stuck in a Washing Machine and See How He Reacts Send your boyfriend a frantic text saying you’re stuck in a washing machine and need help getting out. Keep up the joke by describing your “situation” in detail. Text Example: “Help! I was trying to reach something behind the washing machine and now I’m stuck! What do I do?!” “It’s starting to spin! I might come out dizzy… ” Tip: This prank works best if you keep the tone humorous and over-the-top. 12. Pretend You’re Suddenly Obsessed with a Random Hobby and Bombard Him with Facts About It Act like you’ve discovered a new, obscure hobby, like “extreme ironing” or “competitive duck herding,” and can’t stop talking about it. Send him random facts and updates constantly. Text Example: “Did you know extreme ironing is a real sport?
Personalized Mother’s Day Gifts
As Mother’s Day approaches, finding the perfect way to celebrate the amazing women in our lives becomes more meaningful than ever. Whether you’re shopping for your mom, grandmother, aunt, stepmom, or a cherished mother figure, choosing the right Mother’s Day gift is all about showing love, gratitude, and appreciation. But what if you’re planning gifts for moms on a larger scale—like a workplace celebration, community event, or organization giveaway? That’s where bulk-friendly and customizable Mother’s Day gift ideas come in. In this guide, you’ll find inspiration for thoughtful, practical, and personal gifts that are easy to scale and impossible not to love. Mother’s Day Gift Ideas for Your Mom (Because She Deserves It All) When it comes to Mother’s Day gifts, no one deserves more thought and care than your own mom. She’s been there through every moment, and this is your chance to give back with something truly special. Whether she’s sentimental, stylish, or all about practicality, there are endless Mother’s Day gift ideas that show just how much she means to you. Here are some heartfelt gifts for mom: A handwritten letter paired with a framed family photo A personalized birthstone necklace with her kids’ names A cozy weighted blanket for ultimate relaxation A subscription box tailored to her hobbies (like books, wine, or gardening) A DIY spa basket with her favorite bath and beauty products These thoughtful touches turn an ordinary Mother’s Day gift into something unforgettable—and remind her she’s cherished every day, not just in May. Mother’s Day Gifts for Daughter-in-Laws (That She’ll Actually Love) Your daughter-in-law is part of the family, and Mother’s Day is the perfect time to let her know how much she’s appreciated. Whether she’s a new mom or raising a full house, a thoughtful Mother’s Day gift goes a long way in making her feel seen and celebrated. Great gift ideas for your daughter-in-law include: A self-care gift box with candles, bath salts, and skincare treats A personalized necklace with her children’s initials A “Mom Fuel” tumbler or coffee set for busy mornings A journal or gratitude planner to support her mental wellness A spa gift certificate for some real me-time No matter what you choose, the best gifts for moms are the ones that reflect her personality, lifestyle, and love language. She’ll remember the thought behind it more than anything. Mother’s Day Gift Ideas for Coworkers, Clients, or Employees Looking for Mother’s Day gifts that work in a professional setting? Whether you’re a business owner, manager, or team leader, acknowledging the moms on your team or in your client base is a thoughtful gesture that builds connection and boosts morale. These Mother’s Day gift ideas strike the perfect balance between meaningful and professional: A luxe pen set or planner with a handwritten note A self-care package with tea, candles, and chocolates Branded tote bags filled with practical goodies Gift cards to local restaurants or wellness centers Mini succulents or low-maintenance desk plants These are easy-to-scale gifts for moms that show appreciation without feeling overly personal—ideal for the workplace. Mother’s Day Gift Ideas for New Moms New moms deserve all the love (and sleep!) in the world. Their first Mother’s Day gift should feel personal, comforting, and encouraging—something that celebrates their new chapter while offering a little support along the way. Here are thoughtful gifts for new moms: A cozy robe and slipper set for middle-of-the-night feedings A personalized name necklace with the baby’s name or initials A postpartum care kit with essentials for healing and relaxation A memory book or baby milestone journal A DoorDash or meal kit gift card to make dinner easier These Mother’s Day gift ideas aren’t just cute—they’re incredibly useful. Whether it’s her first child or third, new moms will appreciate the extra care. Final Thoughts: Thoughtful Mother’s Day Gifts That Leave a Lasting Impression Whether you’re shopping for your own mom, a new mom, a coworker, or someone else special, the best Mother’s Day gifts come from the heart. From sentimental keepsakes to simple self-care treats, these thoughtful Mother’s Day gift ideas are sure to make her feel seen, loved, and celebrated. No matter your budget or relationship, there’s always a perfect way to say “thank you” to the moms who make the world go ’round.

10 Unforgettable Journeys with Your Senior Year Bucket List
A senior year bucket list is a personal roadmap filled with experiences you don’t want to miss. For students in their senior year of high school, creating one is more than just fun—it’s a way to capture memories, celebrate milestones, and prepare for the next big chapter of life. This final year of high school is packed with exciting traditions, from senior pictures to pep rallies, but it can also feel overwhelming with deadlines for college applications, letters of recommendation, and meetings with your school counselor. That’s why having a senior year bucket list helps you stay on track, balancing responsibilities with unforgettable experiences. Whether you’re looking for fun activities with friends, meaningful senior year project ideas, or creative ways to mark your accomplishments, this guide will help you make the most of your last year as a high school senior. 1. Capture Memories with Senior Year Shirts One of the easiest and most fun ways to celebrate your senior year of high school is by designing shirts that represent your class. Matching tees or hoodies become instant keepsakes and are perfect for group photos, pep rallies, or your last spirit week. When brainstorming senior year shirts ideas, think about inside jokes, class mottos, or quotes that capture your group’s personality. Some classes even create shirts with everyone’s signatures on the back, while others go bold with creative graphics or themes inspired by popular TV shows or movies. Custom shirts also make great gifts for your future senior year box ideas—imagine looking back years from now and remembering exactly what it felt like to be a high school senior. Not only do these shirts add to the fun of your senior year bucket list, but they also help build unity and make your class stand out as you count down the days to graduation. 2. Take on Senior Year Project Your final year isn’t just about dances and road trips—it’s also the perfect time to dive into meaningful senior year project ideas. These projects give you the chance to explore your passions, showcase your creativity, and even build experiences that stand out on college applications. Some high school seniors choose academic-based projects, like science research, art portfolios, or writing collections that impress admissions officers. Others focus on personal growth projects, such as community service, starting a small business, or documenting their journey on social media. Here are a few senior project ideas to spark inspiration: Community Impact: Organize a fundraiser, start a volunteer initiative, or work with local nonprofits. Creative Showcase: Write a short story collection, launch a podcast, or curate an art exhibit. Practical Prep: Build a budgeting guide, design a career plan, or research majors before you apply to college. No matter which project you choose, it should reflect who you are as a high school student and what you hope to achieve after graduation. Adding one to your senior year bucket list ensures you walk away with something meaningful to carry into the future. 3. Build a Senior Year Box of Memories High school flies by faster than you think, and one of the best ways to hold onto those moments is by creating a senior year box. Think of it as a time capsule filled with keepsakes that represent your final year of high school. Your senior year box ideas can be as simple or as creative as you want. Some students decorate a shoebox or storage bin, while others design personalized memory boxes with class colors, photos, or signatures from friends. The goal is to have a place to collect little treasures that capture the spirit of your last year. Here are some things you can add to your memory box: Photos & Polaroids: From pep rallies, prom, or casual hangouts. Notes & Letters: Save handwritten messages from friends, or write a letter to your future self. Mementos: Ticket stubs, programs, or pieces of senior year shirts ideas. Keepsakes from Projects: Anything meaningful from your senior project ideas. Years down the road, opening your senior box will instantly transport you back to the excitement of being a high school senior. Adding this to your senior year bucket list ensures those memories never fade. 4. Make a Senior Year Checklist for Success Between classes, social events, and planning for the future, the senior year of high school can feel overwhelming. That’s why having a senior year checklist is so important—it helps you stay on track while making time for fun. Your checklist should cover both academic responsibilities and personal goals. On the practical side, include deadlines like: Meeting with your school counselor Submitting college applications on time Requesting letters of recommendation Preparing to apply to college with transcripts and test scores But your senior year checklist shouldn’t just be about paperwork. Add experiences that bring joy and create balance, like attending your last football game, taking part in spirit week, or even starting a senior year bucket tradition with friends. The best part? A checklist keeps you accountable. Whether it’s big responsibilities that impress admissions officers or small moments that help you spend time with friends, checking items off one by one ensures you don’t miss out on anything during your final year of high school. 5. Go on a Road Trip with Friends Nothing says “senior year of high school” like hitting the road with your closest friends. A road trip is the ultimate way to check an experience off your senior year bucket list while making memories that will last a lifetime. Whether it’s a weekend getaway to a nearby city, a trip to the beach, or a scenic drive through your state, planning a road trip helps you spend time with friends before graduation. Along the way, you can document your journey on social media, create playlists that capture your year bucket list vibe, and take plenty of photos for your senior year box ideas. Some tips to make your trip unforgettable: Plan Together: Let everyone contribute to destinations, activities, and playlists. Budget
Your Ultimate Summer Bucket List for 2025
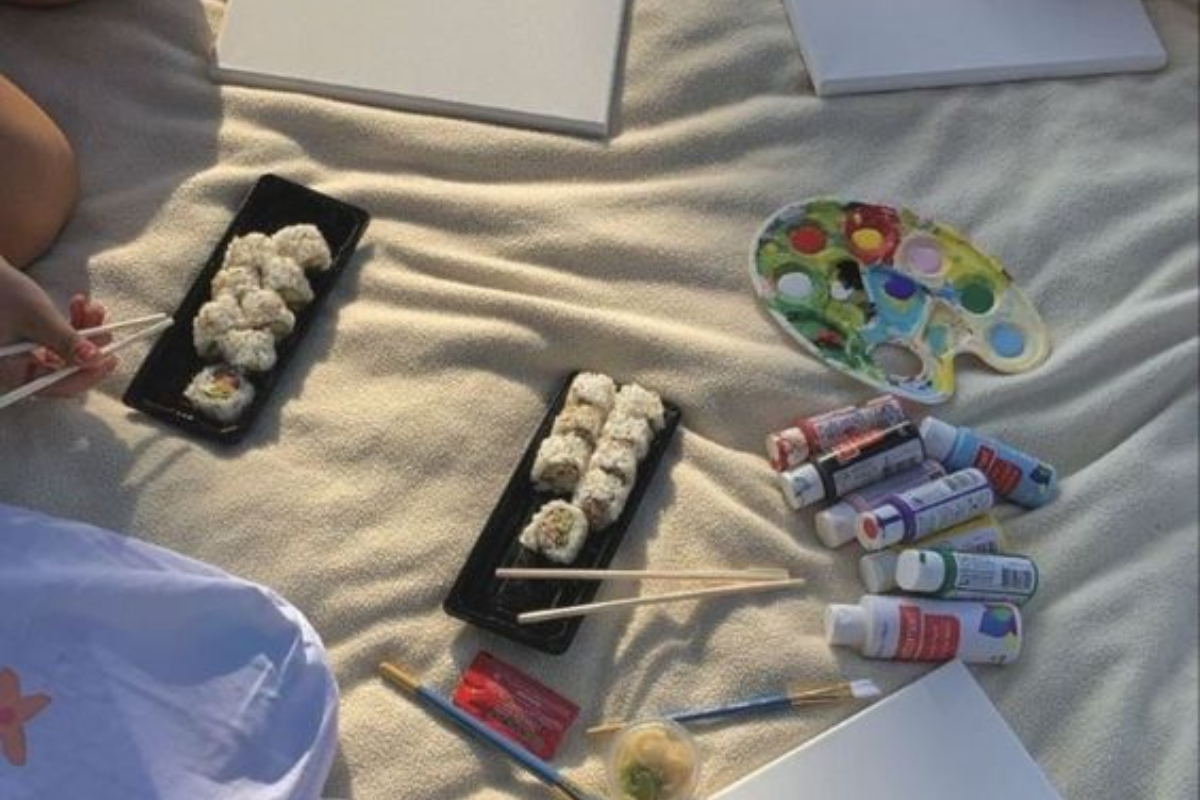
A summer bucket list is simply a list of fun things you want to do before the season ends. Think of it as your personal guide to making the most of long sunny days, warm nights, and all the adventures that summer brings. So, why create a summer bucket list? Because summer always seems to fly by. Without a plan, it’s easy to spend the days saying “we should do this sometime”—and then it never happens. When you write things down, you give yourself a little roadmap to follow. The best part? A bucket list doesn’t have to be complicated. It can include big adventures like a road trip or simple joys like visiting your favorite ice cream shop. By taking a few minutes to create a summer bucket list, you’ll make sure your summer is filled with memories, not missed opportunities. 100 Summer Bucket List Ideas to Try in 2025 Summer 2025 is the perfect time to pack your days with fun adventures and little joys. Here are 100 summer bucket list ideas to inspire you. Outdoor Adventures Take a weekend road trip. Hike a trail at a national park. Visit your state parks. Go camping under the stars. Spend the day exploring a new city. Try zip-lining through the trees. Ride your bike on a scenic trail. Have a picnic at a local park. Watch the sunrise from a mountaintop. Spend time gardening and planting flowers. Go horseback riding. Plan a family day trip to a new spot. Explore a nearby waterfall. Take a hot air balloon ride. Rent a cabin in the woods. Go kayaking or canoeing. Try geocaching for a mini scavenger hunt. Spend the day at the beach. Take a drive to see wildflowers. Go stargazing on a clear night. Water and Sun Fun Activities Spend the day at a water park. Have a backyard water balloon fight. Go paddleboarding at the lake. Try surfing or bodyboarding. Have a pool party with friends. Go tubing down a river. Watch an outdoor movie at a drive-in. Try snorkeling on vacation. Build the biggest sandcastle at the beach. Play beach volleyball. Float in the pool with a good book. Go jet skiing. Have a boat day with friends. Swim in a natural spring. Watch the sunset by the water. Take a sailing lesson. Visit a splash pad with kids. Have a night swim. Go fishing at dawn. Try a new watersport. Food and Seasonal Treats Visit your local farmer’s market. Pick seasonal fruit at a farm. Try every ice cream shop in your town. Host a backyard BBQ. Make homemade popsicles. Try grilling pizza outdoors. Bake a fruit pie with summer berries. Have a picnic with seasonal treats. Try a food truck festival. Host a seafood boil. Make fresh lemonade from scratch. Create a summer charcuterie board. Visit a vineyard or brewery. Make s’mores around a fire pit. Try new summer cocktails or mocktails. Host a taco night outdoors. Try a new smoothie recipe with fresh fruit. Visit a farmers’ night market. Plan a themed dinner under the stars. Take a cooking class together. Creative and Family Fun Host a scavenger hunt in your neighborhood. Spend time learning a new hobby. Try painting outdoors. Create a scrapbook of summer memories. Have a board game night on the porch. Take family photos in matching outfits. Make a playlist of your favorite summer songs. Try DIY tie-dye shirts. Visit a museum or art fair. Write a list of 20 fun things to do before summer ends. Host a backyard talent show. Volunteer at a local charity. Go to a community fair or festival. Spend the day without screens. Do a summer reading challenge. Fly kites at the park. Try roller skating or skateboarding. Host a karaoke night outside. Build a fort with blankets in the yard. Create your own backyard carnival. Go mini-golfing. Try a new workout outdoors. Make friendship bracelets. Spend time baking with kids. Visit a zoo or animal sanctuary. Have a pajama day inside when it’s too hot. Try a science experiment outdoors. Go bowling on a rainy day. Host a storytelling night around the fire. Learn a dance routine together. Play flashlight tag after dark. Visit a botanical garden. Spend time doing random acts of kindness. Do yoga outdoors at sunrise. Plan a backyard campout. Make a summer vision board. Visit a drive-in movie for a classic night out. Create chalk art on the sidewalk. Spend time at a carnival or amusement park. End summer with a big family party. How to Plan a Summer Bucket List Creating your summer bucket list is fun, but a little planning goes a long way. Using a summer bucket list template or a summer bucket list printable can make it easier to organize your ideas. Here’s a simple way to plan: Brainstorm Ideas Write down everything you want to do this summer—big or small. Think of outdoor adventures, foodie stops, and family fun. Categorize Your Activities Group your ideas into sections like outdoor adventures, water fun, seasonal treats, or creative projects. This helps you balance your summer. Set Priorities Choose your top 10–20 must-do activities. These are the ones you really don’t want to miss. Use a Template or Printable Fill in your summer bucket list template or use a printable version. This makes it easy to check off completed activities and track your progress. Schedule Your Favorites Block out time for your top picks. Even one day a week can turn your summer into an unforgettable season. Planning your summer bucket list ensures that your days are full of memories, not missed opportunities. By using a template or printable, you can easily share your list with friends or family and make summer 2025 your favorite time yet! Bucket Lists for Other Seasons While summer is the perfect time for adventure, creating a bucket list doesn’t have to stop when the leaves fall. You can make a fall bucket list for cozy activities, a winter bucket list

20 Self Care Saturday Ideas for a Renewed Mind
We all know that Life can feel like a never-ending to-do list. But guess what? You deserve to slow down and take care of yourself. Self-care isn’t just a trend—it’s the key to feeling happier, healthier, and more you. That’s why Self Care Saturday is here! A whole day just for you to relax, recharge, and do things that make you feel amazing. Whether it’s a cozy movie night, a little DIY spa time, or dancing around your room, self-care is all about the little things that bring you joy. Let’s dive into some fun, easy, and totally doable self care ideas to turn your Saturday into the ultimate me-time moment. But before we get into it, let’s first understand what Self-Care Saturday is. What is a Self Care Saturday? Self Care Saturday is all about hitting pause on the chaos of life and making yourself the priority—guilt-free! It’s a dedicated day to recharge your mind, body, and soul with activities that make you feel good. Think of it as a mini reset. Whether you spend the day pampering yourself, journaling your thoughts, or just chilling with a good book, the goal is the same: to take care of you. Self-care isn’t selfish—it’s necessary. Your Self-Care Day is about creating a personalized plan that resonates with your unique needs and preferences. And what better day to do it than Saturday? Understanding the Essence of Self Care Okay, now that we know what Self Care Saturday is all about, let’s clear up some myths. Self-care isn’t about spending a fortune or earning it—it’s something everybody deserves! Self-care is for everyone, and it doesn’t have to be a big deal to be effective. Let’s bust these myths so you can start enjoying self-care your way! 20 Self Care Saturday Ideas for the Ultimate Me-Time Glow-Up Now that you know what self care really means, let’s get into the fun part—20 Self Care Saturday ideas to help you glow up, recharge, and put you first. 1. Create a Living Room Yoga Retreat Transform your living room into a peaceful yoga sanctuary. Start by rolling out your mat in a quiet corner and dim the lights. If you’re a beginner, focus on basic stretches like forward folds, cat-cow poses, and seated twists to release tension. If you’re more advanced, you can challenge yourself with sun salutations or a slow flow. To enhance the experience, play calming music, light some candles, or diffuse essential oils. The goal is to move slowly and mindfully, allowing your body to release stress. Don’t forget to end with a few minutes in child’s pose or savasana to fully relax. 2. DIY Spa Treatment with Kitchen Ingredients Head to your kitchen for a simple, budget-friendly spa experience. Combine honey and oats to make a natural exfoliating face mask. You can also try avocado for a moisturizing mask or mix olive oil with sugar for a quick lip scrub. For a full spa experience, run a warm bath, add some essential oils (lavender is my favorite for relaxation), and then apply your DIY treatments while soaking in the tub. The best part? You’re treating your skin with ingredients that are all-natural and gentle. 3. Create a Balcony Oasis for Relaxation If you have a balcony or outdoor space, it’s the perfect spot to unwind and soak up some fresh air. Set up a cozy area with a blanket, pillows, or even a hammock. Bring out a cup of herbal tea (chamomile is great for calming), or indulge in your favorite snack. To really make it special, try some gentle stretches or just sit in stillness, watching the clouds go by. This is a great way to connect with nature without leaving your home. 4. Host a Home Cinema Escape Turn your living room into a movie theater for the day. Create a cozy vibe with blankets, pillows, and a dimly lit room. Grab your favorite snacks (popcorn is a classic), and make it feel like a special event. You can watch your go-to comfort movies, binge a new series, or even try an old-school classic. If you want to make it extra special, invite a friend for a cozy movie marathon—laughter and snacks included! 5. Experiment with Cooking a New Recipe Cooking at home is not only therapeutic, but it’s also a great way to try something new. Whether you’re baking a batch of cookies or making a fresh salad, the key is to have fun with it. Don’t worry about making everything perfect—just focus on the process. You can even challenge yourself by trying a recipe you’ve never attempted before, like homemade pizza or a new dessert. Play around with ingredients, taste as you go, and savor the result. Cooking can feel like a creative outlet when you let go of perfection. 6. Make Your Own Aromatherapy Room Spray Aromatherapy is an easy and affordable way to elevate the mood in your home. You can make your own room spray by mixing water with a few drops of your favorite essential oils. Try lavender for relaxation, citrus for an energizing feel, or eucalyptus for a refreshing, spa-like scent. Simply add the mixture to a spray bottle and spritz around your living area. This is an instant way to refresh your space and create a calming atmosphere. 7. Backyard Picnic for a Dose of Fresh Air Take advantage of your outdoor space by spreading a blanket and enjoying a simple picnic. Whether you’re alone or with a friend, the key is to slow down and savor your food while soaking in the natural surroundings. Pack light bites like sandwiches, fruit, and a refreshing drink. Enjoy the sunshine or the cool breeze and take in the quiet beauty around you. A picnic is a great way to reset and feel connected to nature. 8. Create a Home Library Hideaway Set up a cozy reading nook in your home to escape into the world of books. Pick a quiet corner, add some pillows and
Gluten Free Instant Pot Recipes for Girls on the Go
Gluten free instant pot recipes are a lifesaver for girls on the go who want quick, healthy, and delicious meals without worrying about gluten. Whether you’re following a gluten free diet for celiac disease, wheat allergy, or simply personal preference, cooking with an Instant Pot makes it easy to prepare naturally gluten free foods like vegetables, fruit, and protein-packed dishes in a fraction of the time. With the right recipes and a few tips on checking food labels and avoiding hidden gluten, you can enjoy flavorful meals that fit your busy lifestyle while keeping your small intestine happy and your diet fully gluten free. Why Gluten Free Instant Pot Recipes are a Game-Changer For girls on the go, gluten free instant pot recipes aren’t just convenient—they’re transformative. Following a gluten free diet can feel overwhelming, especially when you’re trying to balance work, school, or social life. Using an Instant Pot allows you to prepare meals quickly while ensuring that your food is safe for people with celiac disease or anyone sensitive to wheat, barley, or rye. One of the biggest advantages of cooking gluten free in an Instant Pot is that you can focus on naturally gluten free food like fruit, vegetables, lean proteins, and gluten free grains. You also reduce the need for processed foods, which often contain hidden protein found in wheat or other gluten-containing ingredients. By choosing ingredients labeled gluten free or processed to remove gluten—following the standard of 20 parts per million—you can enjoy peace of mind while still eating delicious meals. Beyond safety, the Instant Pot locks in flavor and nutrients, making dishes like hearty soups, stews, and grain bowls taste just as satisfying as traditional recipes. For busy lifestyles, this means no sacrificing taste for speed—gluten free eating can finally be effortless, enjoyable, and nourishing. Tips for Cooking Gluten Free in an Instant Pot Cooking safe meals in an Instant Pot doesn’t have to be complicated. Here are some easy tips to make sure your dishes are both healthy and delicious: Check Food Labels – Always read labels carefully. Look for products that are certified safe for people with celiac disease or allergies, which follow the 20 parts per million standard. Use Naturally Safe Ingredients – Fruits, vegetables, beans, and grains like rice, quinoa, or millet are excellent choices. Avoid Hidden Wheat – Some sauces, broths, and packaged foods may contain protein from wheat, barley, or rye. Stick to items that are clearly labeled as safe. Substitute Binding Agents – Recipes that normally use wheat flour can swap in potato starch, arrowroot, or other safe flour alternatives. Clean Carefully – Make sure your Instant Pot is thoroughly cleaned if it’s been used for dishes containing gluten to avoid cross-contamination. With these tips, you can cook quick, healthy meals without worry, even when life is busy. Your Instant Pot makes it easy to enjoy flavorful, nourishing food every day. 15 Instant Pot Recipes to Try Here are some quick and tasty meals you can make in your Instant Pot. These recipes are safe for anyone avoiding gluten and perfect for girls on the go. 1. Chicken and Vegetable Stew Total Time Servings 1 hour 5 min 2 Servings Go To Recipe This hearty stew is a go-to for busy nights. Tender chicken, carrots, and potatoes come together in a rich broth that feels like comfort food in a bowl. What makes it even better is how quickly the Instant Pot locks in flavor, cutting down on cooking time without sacrificing taste. It’s one of those gluten free instant pot recipes that’s simple, filling, and perfect for meal prep. 2. Lentil Soup Total Time Servings 50 minutes 8 cups (6 servings) Go To Recipe Lentils are naturally gluten free, high in protein, and incredibly satisfying. When cooked in the Instant Pot with tomatoes, onions, garlic, and spices, they transform into a warm, hearty soup that’s ideal for both lunch and dinner. This recipe is budget-friendly, freezer-friendly, and a staple for anyone following a gluten free diet who wants something both healthy and comforting. 3. Beef Chili Total Time Servings 40 minutes 4 to 6 servings Go To Recipe Chili is always a crowd-pleaser, and making it in the Instant Pot takes the effort out of long simmering times. Ground beef, beans, tomatoes, and smoky spices come together in under an hour, giving you a rich, flavorful dish that tastes like it cooked all day. It’s one of the best instant pot gluten free recipes because it’s naturally safe, loaded with protein, and can be topped with avocado, cheese, or fresh herbs for extra flavor. 4. Quinoa Pilaf Total Time Servings 30 Minutes 6 Servings Go To Recipe Quinoa is one of the best naturally gluten free grains, and the Instant Pot makes it fluffy and perfectly cooked every single time. In this pilaf, you can mix in sautéed onions, garlic, and seasonal vegetables for extra flavor. It’s a versatile dish that works as a main course or a side. For anyone eating gluten free on a busy schedule, this recipe is quick, healthy, and satisfying. 5. Instant Pot Rice Bowls Total Time Servings 40 Minutes 4-6 servings Go To Recipe Rice bowls are a lifesaver for girls on the go. All you need is rice as your base and then you can top it with your choice of protein and vegetables—think shredded chicken, beef strips, or roasted veggies. The Instant Pot takes the guesswork out of rice cooking, so you always end up with fluffy, evenly cooked grains. It’s one of those instant pot gluten free recipes that you can customize endlessly, making it a perfect weekly staple. 6. Millet and Vegetable Medley Total Time Servings 35 Minutes 6 Servings Go To Recipe Millet is often overlooked, but it’s a nutrient-packed grain that cooks beautifully in the Instant Pot. Toss it with colorful vegetables like zucchini, bell peppers, and carrots for a wholesome side dish. It’s light but filling, making it a great option for lunch

January Income Blog Report
In this January blog report, I’ll share the key developments, analytics breakdown, income details, and the valuable lessons learned during the first month of my blogging journey, which officially kicked off in December 2023. From setting up essential tools to exploring various income streams, it’s been a month of growth and learning. What happened in January I launched my blog in December 2023; however, I started uploading to my blog in January because I wanted this to be my new year thing. I did most, if not all, of my base work in December, and what this included was SEO scheduling, setting up Google Analytics, the search console, my plugins, Ezoic, and my affiliate earnings from Amazon Associates and Linqia. I had also created all my pins, and a few of them took off, so if you’re looking for any pin templates, I have a few of my successful ones for free here. Analytics Breakdown Januray Ezoic Report January Google Search Console Report In January, my website experienced a significant traffic boost, with a total of 9,227 Ezoic pageviews. This surge in pageviews indicates a growing interest in and engagement with the content on my site. Alongside this impressive viewership, the month also saw an impressive interaction rate, with a total of 12.2k clicks. This not only demonstrates the appeal of the content but also highlights the effectiveness of user engagement strategies implemented on the website. Furthermore, the overall reach of my website extended even further, as it garnered a substantial 596,000 impressions in January. Impressions signify the number of times content from the site was displayed, showcasing broad and extensive visibility in the online space. These statistics collectively reflect a positive trend in the website’s performance, both in terms of content consumption and user interaction. Income Report Monetization Earnings Affiliates $40.51 Ezoic Ads $115 My Shop $59.90 Breakdown: Affiliate Programs: Amazon Affiliates: This was a very easy sign-up as the process isn’t long and most of the products I use, therefore recommend, are all on Amazon, so all I had to do was insert the links. Ezoic Ads With I’ve Ezoic it did take the entire month of December to get approved because of their requirements for new blogs, and I was still in the process of getting my blog together, but I was still able to reap the benefits in January. My Shop I currently have 3 products uploaded to my shop and so far, I’ve made 9 sales from my How to start a blog ebook and 1 sale from my notion planner. Goals for February 15k sessions on my blog 100K Pinterest monthly viewers Send five successful news letters Make $50 from my shop Earn $100 in ad revenue What I learned in January 1. Be organized and consistent With blogging, you really have to treat it like a business, and with any business comes planning and organization. This was a vital step in my success. You really have to plan when each blog post or Pinterest pin would be posted and how often I would post ( twice a week). I also had to be consistent to let google and Pinterest know that I was on their platform to create original, long lasting content and to use the content already on their platform. 2. Prioritize SEO in the beginning You MUST learn SEO with your blog, and having a plugin or SEO tool is vital. For my plugin, I use Rank math, and what rank math does is basically tell you Tells you how to optimize your blog title for better click-through rates How to use your keyword in your heading and throughout your content Where and how to add out bound links How to write your meta description and URL The SEO tools that I use are Ubersuggest and Semrush. Now, Ubersuggest is what I use every day. It’s really nice to keep up with your keyword tracking and the overall performance of my site, but with Semrush, it’s great for finding initial keywords and having sematic keywords that would help you rank in your first month. 3. Complete Blog Set-up As I said earlier, I had set up most of my Blog in December but there was still a lot that I had left to do and I truly felt as though this was holding me back . Still having some pages that needed setting up, I was not completely focused on creating and publishing content, so there was a week where my blog looked exactly the same and trust me when I say as a new blog you need to let google ad Pinterest know that you are on their platform to grow and stay and that was not always happening on my blog. 5. Focus on Pinterest So, I tried Instagram, Facebook twitter and Pinterest, Pinterest us the only thing that helped me on my blogging journey and heres why, when a user come to Pinterest they come to get ideas on the website/app of to go to your website/app to get ideas , so its easy to convert your Pinterest traffic to blog traffic. Why the other social media platforms didn’t work for me. Facebook: For me I quickly realized that my intended audience was not on Facebook as the average age of a Facebook user is 25-34 years old and my intended audience is 16-25 years old so it was pretty easy to understand why Facebook users weren’t interested in my content. Twitter: After trying twitter, I believe that it’s a very direct social media platform and it’s main purpose is to offer quick and spicy information, with most of that being what celebrities and influencers are caught up in, so with twitter I was also able to see why I wasn’t getting and results. Instagram: Now Instagram isn’t as bad as Facebook and twitter when it comes traffic conversion because, you can get some traffic from Instagram but you have to be prepared to completely dive in

How to Start a Successful blog
How to successful start a blog in 2025 is more than just a trendy Google search — it’s a smart move for anyone looking to share knowledge, build a personal brand, or create an income stream online. Blogging today isn’t what it used to be. What started as digital journaling has evolved into a powerful platform for creators, coaches, small businesses, and anyone with a message. Whether you’re launching a niche blog about skincare or building a digital product business, blogging opens up doors to passive income, visibility, and long-term growth. Here’s what makes blogging worth it in 2025: It’s low-cost to start — All you need is a domain, a platform like WordPress, and your ideas. It builds your online presence — Essential for freelancers, influencers, or entrepreneurs. You can monetize it — From affiliate links and ads to digital products and memberships. It’s timeless — SEO-friendly blog posts can bring in traffic for years after you hit publish. Starting a blog gives you ownership of your platform — unlike social media algorithms, your blog is a space that’s fully yours. Think of it as digital real estate that gains value the more you nurture it. Choosing the Right Niche If you want to know how to successful start a blog that actually earns, your niche will make or break it. A niche is the focused topic your blog covers — like skincare for teens, personal finance for single moms, or minimalist home decor. Niching down doesn’t limit you; it sets you up as the go-to expert in your space. Instead of being just another “lifestyle blogger,” you’re now the blogger who helps college students budget without giving up iced coffee. How to Choose the Right Niche for You Interest + Experience: What could you write 20 posts about without running out of ideas? Audience Demand: Use tools like Google Trends, Pinterest, or Answer the Public to see what people are searching. Monetization Options: Can you recommend products? Offer services? Create digital goods? Competition Check: High competition means there’s a market — but you’ll need to niche down further or offer a unique twist. Example: Instead of starting a general “wellness” blog, niche down to “wellness for postpartum moms with limited time.” It’s specific, targeted, and solves a clear problem. Why You Must Niche Down When you try to write for everyone, you attract no one. Readers want solutions to their problems, not a scattered list of blog posts. Niching down builds trust and makes it easier to grow an audience that sticks around. Start Writing Your Content (Before Launch) One of the biggest mistakes beginners make when learning how to start successful a blog for beginner is rushing to design a site with no content ready. Instead, flip the process: write first, design later. Here’s how to write your first blog posts in smart, strategic steps: Step 1: Plan 5–10 Core Blog Posts Before launching, you should have a few strong posts ready to go. These should solve real problems for your target reader. Think: “How to Budget with a Part-Time Job in College” “The Best 10-Minute Skincare Routine for Busy Moms” “DIY Home Office Setup on a Budget” Use your niche to guide your topics and start with evergreen content that will stay relevant over time. Step 2: Use a Simple Post Structure A great blog post has: A hook in the intro (speak directly to your reader’s problem) Clear subheadings (H2/H3s with keywords) Easy-to-skim paragraphs and bullet points A call-to-action at the end (comment, share, join your email list) Bonus tip: Use the main keyword (like “how to start succesful a blog”) naturally in your intro and headings. It helps with SEO and sets the tone. Step 3: Outline Before You Write Don’t open a blank page and hope for the best. Start by jotting down a basic outline of what the post will cover — this helps you stay focused and makes writing way easier. Step 4: Write in Batches Try to write a few blog posts before you even buy your domain. This removes the pressure of publishing immediately and gives you time to edit and improve your writing. I recommend: Writing 3 posts your audience needs right now Writing 1 post that shows your personality or experience Writing 1 “start here” or introduction post Step 5: Edit Like a Pro Use tools like Grammarly or Hemingway Editor to catch grammar errors and awkward sentences. Then, read your post out loud. If something sounds clunky, revise it. Clear writing = better reader trust. Designing Your Blog: Tips Before You Start When people ask how to start sucessful a blog, they often think design is the first step — but it’s actually the third or fourth. By now, you should already have your content written or planned out. That way, you’ll know exactly how to organize your layout and what your readers need to see first. Here’s how to approach your blog design like a pro (even if you’re not tech-savvy): Step 1: Get Visual Inspiration Before touching WordPress or any website builder, start by collecting inspiration. Look at other blogs in your niche — what do you like about their layout? Save designs you love on Pinterest or Notion. Pay attention to things like: Navigation (menu, categories) Fonts (clean and easy to read) Colors (3-color max works best) Photo layout and featured images Tip: Avoid copying someone else’s design exactly — aim to be inspired, not identical. 07/29/2025 07/29/2025 07/29/2025 07/29/2025 07/29/2025 07/29/2025 07/29/2025 07/29/2025 07/29/2025 07/29/2025 Step 2: Use Canva or Figma to Mock Up Your Blog If you’re a beginner, Canva is your best friend. Create a simple mockup of your homepage, sidebar, and blog post layout so you know where everything goes before you log in to WordPress. You don’t need to be a designer — even a rough visual plan helps you: Avoid overwhelm Choose a cohesive theme Know where to place opt-ins, menus, and social links Step 3: