Light Academia capsule wardrobe is all about timeless pieces that balance vintage-inspired elegance with modern sophistication. Picture yourself surrounded by dreamy libraries, ivy-covered campuses, and golden autumn light, dressed in outfits that feel romantic yet practical. The light academia aesthetic leans into warm neutrals, classic tailoring, and cozy textures, giving you a wardrobe that’s not only stylish but also endlessly versatile. If you’re ready to curate a closet that feels cohesive, chic, and undeniably you, this guide will walk you through the essentials. This guide will walk you through creating a wardrobe that not only captures the essence of Light Academia but also makes getting dressed every morning a delight. Let’s dive in! Step 1: Draw Inspiration from Pinterest Start your Light Academia capsule wardrobe journey by turning to Pinterest, the ultimate treasure trove for outfit ideas. Begin by searching for “button-up shirts Light Academia outfits.” You’ll quickly notice how often the classic white button-up shirt pops up—it’s a staple in this aesthetic. Add this to your shopping list as your first must-have item. But don’t stop there! Scroll through the outfits featuring white button-ups and find the look that speaks to you the most. Let’s say the outfit pairs the shirt with a timeless tennis skirt. Now, switch gears and search for “tennis skirt Light Academia outfits.” Save all the combinations that catch your eye. Repeat this process for different outfit elements about 10 to 15 times. For example, if another look pairs the white shirt with high-waisted trousers or a plaid midi skirt, dive into those searches as well. By the end, you’ll have a variety of outfits saved that use similar core pieces but offer a fresh twist with each combination. This will be the foundation of your Light Academia capsule wardrobe. Step 2: Pay Attention to Light Academia Colors While Pinterest is an amazing tool, not every outfit tagged “Light Academia” will truly fit the aesthetic. To keep your wardrobe cohesive, take note of the signature colors associated with Light Academia. These tones are soft, muted, and timeless, creating a dreamy and sophisticated vibe. Look for shades like cream, beige, ivory, soft browns, camel, taupe, and dusty pastels like sage green or muted lavender. Classic black and white can also be used sparingly for contrast. Avoid anything too bold, neon, or overly saturated, as these don’t align with the aesthetic. As you scroll through your saved outfits, double-check that the pieces and color palettes match the true Light Academia vibe. For example, if you see a button-up shirt in a bright red or a tennis skirt in a loud print, it’s likely leaning away from the aesthetic. Stick to those soft, neutral shades that evoke the cozy, vintage charm Light Academia is known for. This step will help you filter out Pinterest’s occasional misses and keep your Light Academia capsule wardrobe beautifully on theme. Step 3: Shop for Affordable, Quick, and Quality Pieces Once you’ve identified the key items and colors for your Light Academia capsule wardrobe, it’s time to shop! While luxury pieces are dreamy, you can absolutely achieve this aesthetic on a budget. Stores like Amazon and Shein are great places to start, offering plenty of affordable options that look stylish and on-trend. On Amazon, you can search for basics like white button-up shirts, plaid skirts, and high-waisted trousers in neutral tones. Check reviews to ensure the quality is decent for the price. Shein, on the other hand, has a wide variety of budget-friendly pieces, from soft cardigans to pleated skirts. Just be mindful of sizing and fabric descriptions, and read customer feedback to avoid any surprises. Other affordable options include H&M, Uniqlo, and Zara—all of which often have timeless, neutral-toned pieces that align with the Light Academia vibe. If you’re looking for even more budget-friendly finds, consider thrift stores or vintage shops. They’re perfect for scoring unique blazers, trench coats, or knit sweaters that add a touch of authenticity to your wardrobe. With these stores in mind, you’ll have plenty of options to start building your dream Light Academia capsule wardrobe without breaking the bank! Step 4: Accessorize to Complete the Look Accessories are the finishing touch that will elevate your Light Academia outfits and tie everything together. Pinterest can once again serve as your guide—search for “Light Academia accessories” to gather ideas like leather crossbody bags, vintage-style watches, or delicate gold jewelry. These small details help elevate your Light Academia capsule wardrobe, bringing a polished, academic vibe to every outfit. For affordable and aesthetic accessories, check out stores like Etsy for handcrafted pieces with a vintage feel, H&M for simple yet elegant jewelry, and Shein for trendy options that won’t break the bank. Amazon is also a great place to find scarves, berets, and tortoiseshell glasses to channel that studious aesthetic. When blending accessories into your outfits, keep it subtle but intentional. For example: Pair a cream turtleneck and plaid skirt with a leather belt and matching loafers. Add a beret or a simple headband to a blazer and trousers combo for a touch of Parisian flair. Layer delicate gold necklaces over a white button-up shirt, or carry a structured crossbody bag with a trench coat for that classic academic vibe. Stick to accessories in neutral tones, earthy shades, or metallics like gold and brass to maintain the Light Academia capsule wardrobe color palette. Remember, accessories are the cherry on top—they shouldn’t overwhelm your outfit but rather enhance it with a subtle touch of sophistication. Step 5: Organize and Plan Your Outfits Once you’ve gathered all your Light Academia pieces and accessories, it’s time to start styling! A great way to visualize your wardrobe and create outfit combinations is by using apps designed for outfit planning, like Indyx. This app allows you to upload photos of your clothing items and organize them into a digital wardrobe. You can mix and match pieces to create layouts for your outfits, which is especially helpful for planning those dreamy Light Academia looks. For instance,
Cheap Hobbies you Can Enjoy without leaving Home
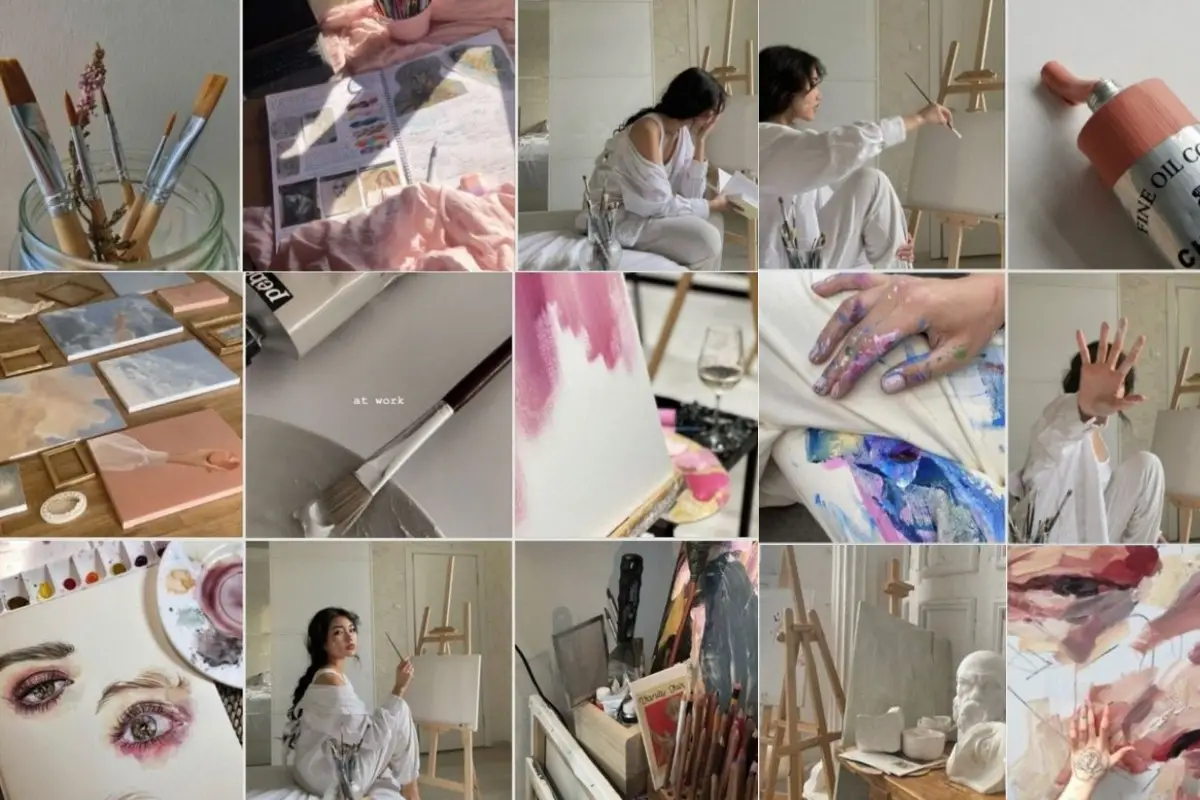
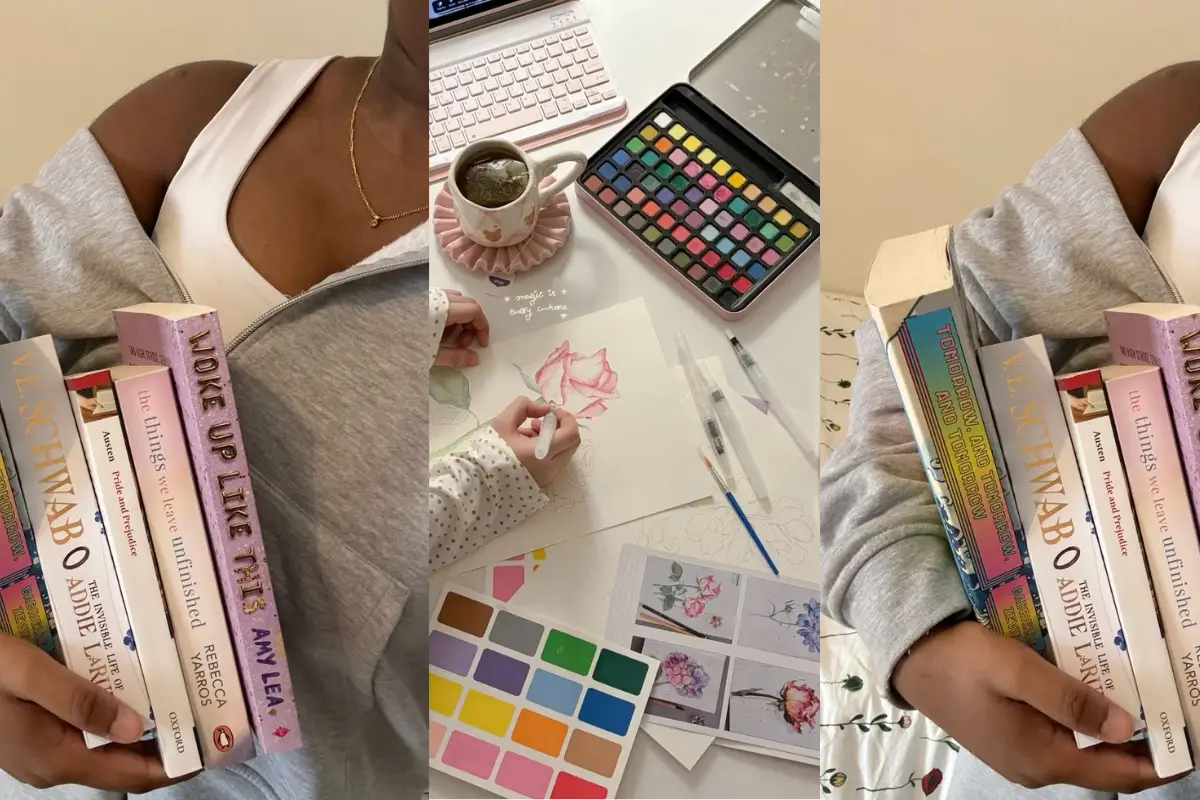
Hey Girl, Looking for cheap hobbies and fun, creative ways to spend your time without breaking the bank? Whether you’re winding down after a busy day or just want to try something new, there are plenty of hobbies that are not only affordable but also totally doable from the comfort of your own home.. From artsy crafts to self-care moments, there’s something for every girly girl out there! So, grab your fave cozy blanket, pour yourself a cup of tea, and let’s dive into these cheap and cheerful hobbies you can enjoy right from your couch. Trust me, you’ll find your next obsession here! 1. Reading Who says you need to leave home to go on an adventure? Reading is the perfect hobby to dive into, whether you’re into dreamy romance novels, thrilling mysteries, or self-help books that help you glow up from the inside out. Plus, reading is totally budget-friendly. You can find books at your local library for free, or download e-books and audiobooks from websites like Project Gutenberg or LibriVox. For cheap hobbies, diving into e-books is a fab option you can carry on your phone, tablet, or Kindle. Audiobooks are perfect for those days when you want to relax and listen while doing other things—like doing your nails or organizing your closet. No matter how you enjoy them, you’ll be transported into different worlds without spending a dime. 2. Drawing or Sketching Feeling creative? Drawing or sketching is the perfect way to express yourself without needing a ton of fancy art supplies. All you need is a pencil and some paper (yes, that notebook you already have lying around will work!). Whether you’re doodling cute little florals, sketching portraits, or just letting your imagination run wild, drawing is a fun and relaxing way to spend your time. The best part? You don’t need to be a professional artist to enjoy it! Start with simple sketches, experiment with different styles, and watch your skills improve over time. Plus, there are tons of tutorials online to help guide you if you want to level up your drawing game. So, grab your sketchbook and let your creativity flow—you might just surprise yourself! 3. Journaling There’s something magical about putting pen to paper, right? Journaling is such a therapeutic hobby that doesn’t require spending much at all. Whether you’re jotting down your daily thoughts, creating a vision board for your future, or starting a gratitude journal, writing helps clear your mind and keep you grounded. Cheap hobbies like DIY crafts let you make your own greeting cards, home decor, or even small personalized gifts for friends and family. The possibilities are endless, and the best part? It’s a super affordable way to indulge your creative side. Plus, you’ll feel so proud when you see the cute things you’ve made with just a little imagination! 4. DIY Crafting Who doesn’t love a little DIY magic? Crafting is an amazing way to express your creativity without spending a lot of money. You’d be surprised at how many fun projects you can create using supplies you already have lying around your house! Think old magazines, fabric scraps, or cardboard—yes, it’s time to turn those things into something fabulous. Cheap hobbies like DIY crafts let you make your own greeting cards, home decor, or even small personalized gifts for friends and family. The possibilities are endless, and the best part? It’s a super affordable way to indulge your creative side. Plus, you’ll feel so proud when you see the cute things you’ve made with just a little imagination! 5. Knitting or Crocheting Ready to get cozy and crafty? Knitting or crocheting is a soothing hobby that’s easy to start and can quickly become your new obsession. All you need is some yarn and needles (or a hook, if you’re crocheting), and you can create everything from cute scarves to cozy blankets, or even little plushies to gift to your friends. Cheap hobbies like crocheting or knitting are perfect for chilly nights when you just want to curl up with your favorite Netflix show and get crafty. Once you get the hang of it, you’ll be hooked (pun intended)! With tons of free tutorials online, it’s easy to start, and before long, you’ll have a collection of homemade creations to proudly show off. 6. Cooking or Baking Who says you need to dine out for a tasty treat? Cooking or baking at home is not only a fun way to spend your time, but it’s also super cost-effective! You don’t need fancy ingredients to make a delicious dish. Start with simple recipes and get creative in the kitchen—whether you’re baking cookies, whipping up a hearty dinner, or experimenting with new flavors for a sweet treat. Cheap hobbies like cooking or baking let you enjoy the fruits of your labor afterward (yum!). You might even stumble upon a new favorite recipe that’s perfect for sharing with friends or family. So, put on your cutest apron, get your hands a little messy, and discover the joy of creating something delicious from scratch. 7. Yoga or Meditation Need a little peace and relaxation? Yoga or meditation could be exactly what you need to unwind and reconnect with yourself. All you need is a mat or towel, and you can start practicing in the comfort of your own living room. Whether you’re stretching through some yoga poses or calming your mind with meditation, these practices help reduce stress and boost your mood—plus, they’re totally free! Cheap hobbies like knitting or crocheting offer tons of free tutorials online for every skill level, whether you’re a beginner or a seasoned pro. Get ready to feel zen, refreshed, and recharged—all without leaving the comfort of your home. 8. Puzzles or Brain Teasers If you’re in the mood for a fun challenge, puzzles and brain teasers are the way to go! Whether you’re into jigsaw puzzles, Sudoku, or crossword puzzles, these activities are perfect for keeping your brain sharp while having a
How to do a Hobby on a Budget
Hey Girl, If you’re like me, you’re always looking for ways to sprinkle a little extra fun into your life without draining your bank account. Picking up a new hobby is one of the best ways to do that! But let’s be real: some hobbies can get pricey fast, and who has the budget for that when we’re busy saving for cute outfits, dream vacations, and coffee runs? The good news is, you don’t need to spend a fortune to dive into something you’re passionate about. In fact, there are so many creative ways to enjoy a hobby and stay financially savvy. Whether you’re into crafting, fitness, cooking, or even starting a side hustle, there’s always a way to make it work on a budget. In this post, I’m going to share my ultimate guide to starting a hobby without breaking the bank. I’ll show you how to find affordable supplies, use free resources, and even repurpose things you already own—all while staying fabulous, of course. Let’s turn that budget into a blessing and create a hobby you’ll love! 1. Choose Budget-Friendly Hobbies Starting a hobby doesn’t have to mean emptying your wallet, babe! The trick is to choose activities that are light on your budget but big on fun and creativity. Some of my absolute faves are: Painting or Drawing: All you need is some paper and a few basic supplies (hello, Dollar Store deals!) to unleash your inner Picasso. Hiking or Walking: Nature is free, and a pair of sneakers is all you need to explore the great outdoors. Plus, it’s such a vibe for mental health and cute Insta stories. Reading: Dive into a new world with library books or free eBooks. Bonus points if you sip tea while you read—it’s a total main character moment. Knitting or Crocheting: Start small with inexpensive yarn and needles. It’s cozy, creative, and perfect for DIY gifts. Baking: Raid your kitchen pantry for staples like flour and sugar to try out simple (and delicious!) recipes. Cookies, anyone? Writing: Whether it’s journaling, poetry, or even starting your blog (so fun!), all you need is a notebook and pen. Learning a New Language: Apps like Duolingo make it easy and free to learn languages, so you can feel fancy saying bonjour or hola. The key is to think about what sparks your interest and start small. You can always level up as you go, but for now, focus on hobbies that bring joy without the splurge. 2. Use Free Online Resources Girl, we live in the digital age, and trust me, the internet is your best friend when it comes to affordable hobbies. There are so many free resources out there that can help you learn, practice, and even master your new hobby without spending a dime. Here are my go-to tips for making the most of what’s online: YouTube Tutorials: From painting to yoga to DIY crafts, YouTube is packed with free step-by-step videos for literally every hobby you can think of. Just search and get inspired! Pinterest Boards: Pinterest is my holy grail for hobby ideas, project inspiration, and even free patterns for things like knitting or sewing. It’s like your personal mood board for every creative venture. Free Apps: Whether you’re learning a language (hello, Duolingo), practicing mindfulness (try Calm’s free features), or tracking fitness goals, there’s an app for that—and many are free or have budget-friendly versions. Online Libraries: Did you know some libraries offer free digital access to books, audiobooks, and magazines? Check out apps like Libby to borrow content for free. Total game-changer! Community Forums: Join free Facebook groups, Reddit communities, or hobby-specific forums. These spaces are amazing for advice, ideas, and connecting with people who share your interests. Free Printable Resources: Tons of blogs (including mine!) offer free printables like coloring pages, planners, or crafting templates to help you get started. Just download and enjoy! The best part about free resources is that you can explore your interests without feeling pressured to commit financially. Take your time, explore, and let your creativity bloom! 3. Repurpose What You Have Starting a hobby doesn’t always mean buying brand-new supplies. Sometimes, the best place to begin is your own home. Take a look around—you might already have everything you need to kick off your new interest. For example: Old clothes can be upcycled into sewing projects or trendy accessories. Kitchen staples like flour, sugar, and spices can inspire baking or cooking experiments. Stationery you already own can be repurposed for journaling, sketching, or even creating handmade cards. Empty jars, cans, or cardboard can become materials for DIY crafts or home décor projects. Repurposing not only saves money but also adds a creative twist to your hobby. Plus, it’s eco-friendly—a win-win! 4. Shop Secondhand or Look for Deals If you do need supplies, secondhand stores and discount shops are your secret weapons for staying on budget. Thrift stores, dollar stores, and flea markets often have hidden treasures at unbeatable prices. Online marketplaces like Facebook Marketplace, eBay, or local community swap groups can also help you find materials for a fraction of the cost. For example, you can score gently used art supplies, knitting kits, or even sports equipment for much less than retail prices. Keep an eye out for sales, clearance sections, and coupons to make every dollar count. With a little patience, you can build your hobby stash without overspending. 5. Join Hobby Clubs or Groups Exploring a hobby is so much more fun when you have a supportive community around you. Many community centers, libraries, and local organizations host free or low-cost events that let you try out new activities without spending much—or anything at all. You can also check out Facebook groups or online forums where hobby enthusiasts share tips, organize meetups, and even trade supplies. For example, a local crafting group might host workshops, or a book club could help you dive into your reading goals while connecting with new friends. Being part of

The Ultimate Guide to Finding a Hobby You’ll Love
Let’s face it—life gets hectic, and sometimes you just need something for you. That’s where hobbies come in. Whether it’s learning a new language, rock climbing, or finding a creative outlet like painting, hobbies help you rediscover joy and balance. Hobbies can reduce stress, boost confidence, and even improve problem-solving skills. Plus, they’re a chance to explore different hobbies and interests, like physical activities or relaxing hobbies to do at home. From creative pursuits to social activities, there’s a list of hobbies out there waiting for you. So, if you’ve been wondering, What are some hobbies I can try? or I need a hobby but don’t know where to start, it’s time to dive in. The best hobby is one that brings you happiness and helps you grow. Steps to Discovering the Perfect Hobby for You Finding a hobby can feel overwhelming, but it doesn’t have to be! Here’s how you can discover the perfect one for you: 1. Reflecting on Your Passions and Personality Start by asking yourself: What do I love? What excites me? Your hobbies should reflect your personality and interests. If you’re creative, try a creative outlet like painting or journaling. Love physical activity? Rock climbing or martial arts might be your thing. If you’re more introverted, look into relaxing hobbies to do at home, like reading, crafting, or playing a board game. Think about hobbies that align with your goals and what feels enjoyable. 2. Considering Your Time, Budget, and Resources Not all hobbies need to break the bank. Reflect on how much time and money you can realistically spend. For example, hobbies like gardening or learning a new language are affordable and flexible. If your schedule is tight, explore easy hobbies to pick up, like cooking or yoga at home. If you’re looking to save money on your hobbies, consider ones that use resources you already have, like upcycling or DIY projects. 3. Exploring Hobbies That Fit Your Goals Think about what you want to get out of your hobby. Do you want to reduce stress, improve communication skills, or simply have fun? Look for hobbies to try in 2025 that match your goals. For social connections, join a book club or take a dance class. For skill-building, try a creative hobby or play an instrument. If you’re wondering, What are some great hobbies for personal growth?—martial arts, photography, or even wine tasting can be unique hobbies to explore. Overcoming Common Challenges When Starting a Hobby Starting a hobby is exciting, but it’s not always smooth sailing. Many people face challenges that make it hard to begin or stay consistent. Let’s explore three common obstacles and how to overcome them: breaking out of your comfort zone, finding motivation, and managing time for your new passion. 1. Breaking Out of Your Comfort Zone Trying something new can feel intimidating, especially if it’s outside your usual interests or skills. Fear of failure or judgment often holds us back. How to Overcome It: Start Small: Choose a low-pressure version of the hobby. For example, if you want to try painting, start with a simple DIY kit instead of signing up for an advanced class. Embrace the Beginner Mindset: Remind yourself that it’s okay to be a beginner—everyone starts somewhere! Seek Support: Join a beginner-friendly group or community where others are in the same boat. Example: I was nervous about starting yoga because I thought I wasn’t flexible enough. But joining a beginner class and practicing at home helped me ease into it. 2. Finding Motivation to Try Something New The hardest part is often just starting. It’s easy to procrastinate or let self-doubt creep in. How to Overcome It: Visualize the Benefits: Think about why you want to start this hobby. Is it to relax, improve a skill, or meet new people? Keep your “why” in mind. Set Achievable Goals: Break your hobby into small, manageable steps. For instance, if you want to learn guitar, start with 15 minutes a day rather than aiming to master full songs immediately. Make It Fun: Pick a hobby you’re genuinely excited about, and don’t hesitate to experiment if one doesn’t stick. Example: I lacked motivation to start journaling until I bought a beautiful notebook. That small step made the process exciting and rewarding. 3. Managing Time for Your New Passion Life can feel too busy to add something new, but prioritizing a hobby can be incredibly fulfilling. How to Overcome It: Schedule It: Treat your hobby like an important appointment. Add it to your calendar and honor that time. Incorporate It Into Your Routine: Choose hobbies that fit seamlessly into your lifestyle. For instance, you can listen to language podcasts during your commute or sketch while watching TV. Start with Micro-Habits: Even five minutes a day can help you build momentum. Example: I thought I didn’t have time to learn a new language, but practicing vocabulary during my lunch break made it doable. How to Turn a Hobby into a Lifelong Passion Turning a hobby into something you’re deeply passionate about doesn’t happen overnight—it takes dedication, enjoyment, and a little effort. Here are three ways to cultivate your hobby into a lifelong passion: 1. Building Skills Over Time Passion often comes from mastery, and the more you grow your skills, the more fulfilling your hobby becomes. How to Do It: Practice Regularly: Set aside consistent time to practice and hone your craft. Even short, daily efforts add up over time. Learn Continuously: Take classes, watch tutorials, or read books about your hobby to deepen your knowledge and abilities. Challenge Yourself: Set new goals to keep things exciting, whether it’s learning a harder song on guitar or tackling a complex knitting pattern. Example: When I started gardening, I knew nothing about plant care. Over time, I learned about soil types, seasonal planting, and pest control, which made the process even more enjoyable. 2. Sharing Your Hobby with Others Passions thrive when they’re shared. Connecting with like-minded people can deepen your
The Ultimate Guide to Y2K Fashion
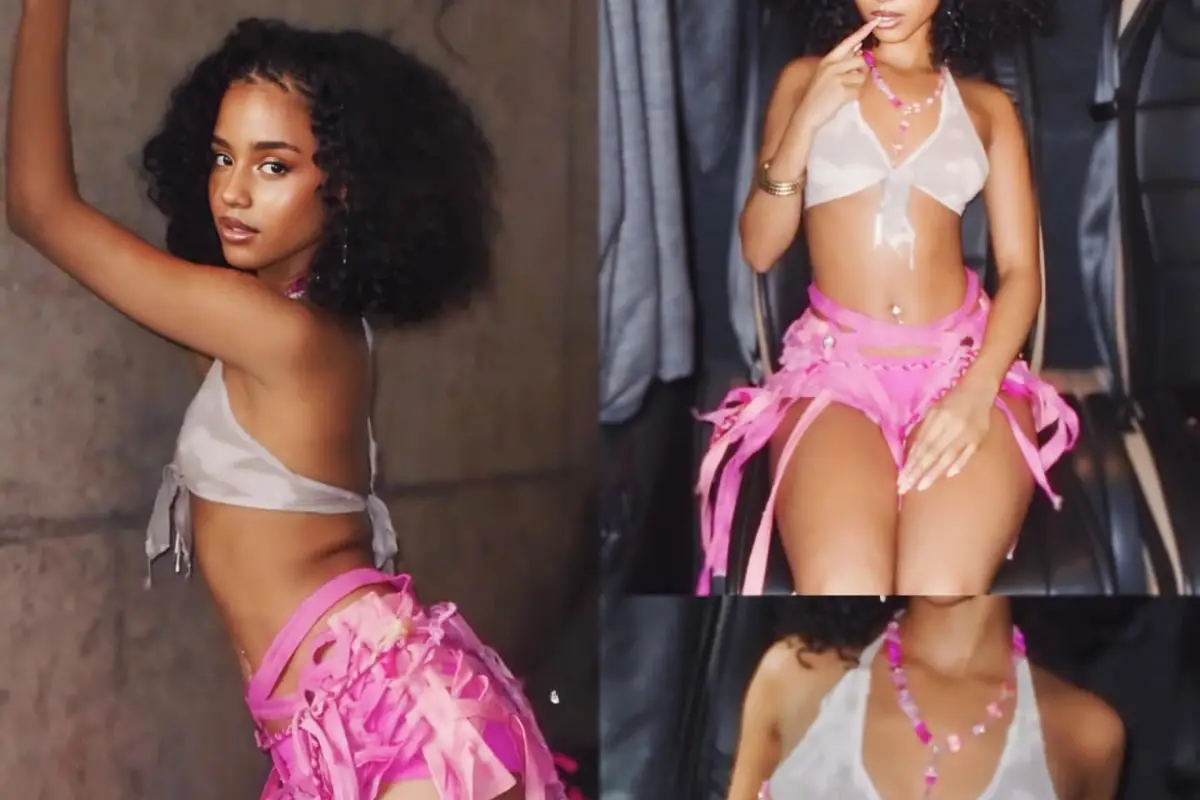
Y2K fashion is more than just a throwback—it’s a bold, glittery celebration of the early 2000s, and it’s back in full swing! From low-rise jeans to velour tracksuits, this trend captures the fun, playful spirit of a time when dressing up was all about turning heads and making a statement. It’s where futuristic vibes meet nostalgic charm, blending metallic fabrics, rhinestone details, and pops of color that scream confidence. Whether you lived through it the first time or are experiencing it for the first time now, Y2K fashion offers a unique chance to embrace your individuality and have fun with your style. It’s over-the-top, unapologetically bold, and perfect for channeling those early 2000s main character vibes. So, get ready to step into the world of butterfly clips, chunky platforms, and baby tees—you’re about to fall in love with Y2K all over again! What is Y2K Fashion? What is Y2K fashion you may ask; Y2K fashion calls back to one of the biggest fashion trends of the late 90s and early 2000s. Think low-rise jeans that hug just right, baby tees with cheeky slogans, shiny metallic fabrics, and, of course, all the glitter you can imagine. It’s the era of flip phones, butterfly clips, and those tiny shoulder bags that barely hold your lip gloss—but somehow, they’re perfect. The vibe is playful and carefree, mixing bold colors, quirky patterns, and a touch of futuristic glam. Y2K fashion makes you feel like you’re channeling early 2000s pop stars—whether you’re rocking a velour tracksuit, chunky platform sneakers, or stacking on rhinestone accessories. It’s about confidence, a little nostalgia, and fully embracing the fun side of fashion. So, if you’re all about that “main character energy,” Y2K is calling your name. Where did Y2K Fashion come from? Y2K fashion emerged in the late 1990s and early 2000s, influenced by the optimism and excitement (and a little fear!) surrounding the new millennium. Back then, everything felt like it was changing—technology was booming, the internet was becoming a thing, and people were imagining what the future would look like. This “futuristic meets playful” vibe spilled into fashion, creating a mix of metallics, shiny fabrics, and bold, experimental designs. Pop culture played a massive role too! Think Britney Spears, Paris Hilton, Destiny’s Child, and early red-carpet looks that screamed glam and drama. TV shows like Lizzie McGuire and Sex and the City brought Y2K looks to life—bedazzled everything, tiny handbags, velour tracksuits, and tinted sunglasses. Even the futuristic aesthetics of movies like The Matrix influenced edgy leather looks and sleek silhouettes, further shaping what we now recognize as Y2K modern media and its impact on fashion. It was all about standing out, experimenting with your style, and embracing the “cool girl” energy of the era. Fast forward to now, and the nostalgic charm of Y2K fashion is back, letting us relive those iconic trends all over again! Why is Y2K Fashion, back in style? Y2K fashion is back in style because nostalgia always has a way of making things cool again, and right now, the early 2000s are having a moment. Younger generations, especially Gen Z, are rediscovering and reimagining trends from that era—low-rise jeans, sparkly makeup, and all. Plus, social media platforms like TikTok and Instagram have made it easy to bring these looks back, with influencers styling Y2K pieces in fresh, modern ways. A big part of the comeback is how playful and carefree Y2K fashion feels. It’s the opposite of minimalism—it’s loud, fun, and doesn’t take itself too seriously. After years of neutral tones and “clean girl” aesthetics, people are ready for something bold and nostalgic. Y2K style offers that, with a side of rhinestones and butterfly clips. Pop culture is also playing a role. Celebrities like Dua Lipa, Bella Hadid, and Olivia Rodrigo have been spotted rocking Y2K-inspired outfits, from mini skirts to metallics. Plus, brands are re-releasing iconic early 2000s items, like the Juicy Couture velour tracksuits we thought we’d never see again. It’s more than just fashion—it’s about capturing the vibe of a simpler, tech-obsessed era when dressing up was all about having fun. And let’s be real, who doesn’t love a good throwback? Key Trends and Styles of Y2K Fashion Let’s dive into the defining trends and standout styles that make Y2K fashion such an unforgettable and iconic era in the world of style. From its playful attitude to its bold, unapologetic choices, these are the must-know elements that bring this nostalgic trend back to life and keep it firmly in the spotlight today: 1. Low-Rise Everything Low-rise jeans, skirts, and pants ruled the early 2000s, showing off midriffs and making crop tops their perfect partner. Bonus points if they’re paired with a visible thong strap (whale tail, anyone?) or a chunky belt. 2. Baby Tees Tiny, fitted T-shirts with quirky slogans, pop culture references, or cute graphics are staples of Y2K fashion. They’re playful, flirty, and so easy to pair with low-rise bottoms. 3. Velour Tracksuits Juicy Couture velour tracksuits were the off-duty it-girl uniform. Matchy-matchy sets in bright colors (with rhinestone logos, of course) are a major throwback trend that’s back and better than ever. 4. Mini Everything Mini skirts, micro bags, and even mini sunglasses—Y2K fashion loves to keep it tiny. Think pleated plaid skirts or metallic minis styled with knee-high boots or platforms. 5. Shiny and Metallics Futuristic vibes were huge in the early 2000s, with shiny fabrics, metallics, and even holographic pieces taking center stage. It’s perfect for adding a glam, space-age touch to any look. 6. Chunky Platforms Platform shoes, from sneakers to sandals, are essential for that bold Y2K look. Bonus points for bright colors or playful designs, like jelly platforms or Mary Janes. 7. Butterfly Everything Butterfly motifs are everywhere in Y2K fashion—on clips, jewelry, and even clothing. It’s all about bringing that dreamy, whimsical vibe to your outfits. 8. Bedazzled and Rhinestone Details More is more in Y2K fashion. Rhinestones and bedazzled embellishments add sparkle to jeans, tees, phone cases,
The Ultimate Guide to Light Academia Fashion
Light academia fashion captures a charming blend of scholarly elegance and timeless aesthetics. In this guide, I’ll explore essential pieces and must-have items that define this whimsical style. From cozy knitwear to vintage-inspired accessories, I’ll help you curate a wardrobe that reflects an appreciation for art, literature, and intellectual pursuits. Emphasizing soft color palettes and classic silhouettes, light academia brings a warm and inviting vibe to everyday wear. I’m excited to share tips on how to incorporate key items like tailored blazers, flowing skirts, and delicate blouses, which can effortlessly elevate your style. The right accessories, such as lace-up shoes and leather satchels, can complete your look, ensuring you embody the spirit of this aesthetic. As we dive deeper, you’ll discover the foundational elements of light academia fashion that resonate with a love for knowledge and artistic expression. Let’s explore how to embrace this enchanting style and make it your own! The Essence of Light Academia Aesthetic Light Academia captures a unique blend of aesthetics that celebrate knowledge, nature, and creativity. It draws inspiration from historical contexts and artistic movements while embodying certain principles that reflect a scholarly life. Historical Influences The Light Academia aesthetic has roots in various historical movements. It often reflects the values of Romanticism, with its emphasis on emotional depth and connection to nature. The Victorian era also plays a significant role, seen in the fashion choices with layers, lace, and soft hues. Another key influence comes from the intellectualism of the Enlightenment, where classical philosophy and literature were pivotal. I find that these historical periods contribute to a sense of nostalgia, inviting me to immerse myself in a world enriched by knowledge. Art and Literature Inspirations Art and literature are central to the Light Academia aesthetic. Influences from classic literature, such as works by Jane Austen and the Brontë sisters, inspire the themes of introspection and exploration. The aesthetic encourages me to engage with texts that provoke thought and imagination. Additionally, visual arts from movements like Impressionism and Pre-Raphaelitism resonate strongly. The light, airy colors in paintings create a tranquil environment that matches the aesthetics’ focus on serenity and beauty. Engaging with these art forms enhances my appreciation for the world around me and deepens my commitment to the values of Light Academia. Light Academia Wardrobe Essentials Creating a light academia wardrobe involves selecting key pieces that reflect an intellectual yet charming aesthetic. It’s about curating items that evoke a sense of nostalgia, warmth, and creativity in my attire. Neutral-Toned Apparel Neutral tones form the backbone of a light academia wardrobe. I love incorporating colors like cream, beige, soft gray, and muted pastels. These shades are versatile and allow for easy mixing and matching. Key pieces include: Turtlenecks Trousers Cardigan Button Up Shirt These items effortlessly contribute to a refined yet approachable aesthetic that’s perfect for any occasion. Layering Techniques Layering is essential to achieving the light academia style. I enjoy playing with textures and lengths to create depth in my outfits. It’s all about balancing comfort and sophistication. Effective layering strategies include: Base Layer: Start with a fitted turtleneck or a classic shirt. Middle Layer: Add a lightweight sweater or a vest for warmth. Outer Layer: A chic trench coat or tailored blazer completes the look. Mixing fabrics like cotton, wool, and linen not only enhances visual interest but keeps me comfortable through varying temperatures. Statement Pieces In light academia fashion, statement pieces elevate the outfit. I choose items that capture attention while remaining true to the aesthetic. These can be subtly bold without overwhelming the look. Important statement items to consider: Vintage Scarves: A timeless print can transform any outfit. Classic Loafers or Oxford Shoes: Footwear should be stylish yet comfortable for long days. Unique Accessories: Think brooches, hats, or delicate jewelry that add character. Incorporating these elements helps me express individuality while staying aligned with the light academia theme. To truly embody the light academia aesthetic, it’s not just about the clothes—it’s about the story they tell. Imagine sipping tea while reading your favorite classic novel, strolling through a quiet library, or taking notes in a leather-bound journal under the soft glow of candlelight. These moments bring the style to life and create a deeper connection to the values it represents. Let your wardrobe become an extension of your appreciation for timeless beauty, intellectual pursuits, and the quiet elegance of everyday life. Conclusion Light academia fashion is the perfect blend of sophistication and charm, allowing you to express your love for classic style and intellectual curiosity. By incorporating key pieces, layering thoughtfully, and adding unique accessories, you can craft a wardrobe that’s as functional as it is beautiful. I hope this guide helps you embrace the warm, inviting spirit of light academia and make it your own.

10 Free Done-for-You Digital Products to Kickstart Your Digital Marketing Journey
Getting into digital marketing can feel like stepping into a world of endless to-do lists—especially when it comes to creating products. But here’s the truth: you don’t need to create everything from scratch to start selling digital products online. Whether you’re launching your first blog, building your email list, or growing a personal brand, done-for-you digital products can give you a serious head start. They’re easy to customize, incredibly useful to your audience, and perfect for beginners. What Are Digital Products (And Why You Should Be Selling Them)? Digital products are downloadable or virtual goods that people can access instantly—no shipping, no inventory, just pure value. Think eBooks, planners, templates, checklists, online courses, or even Notion dashboards. These products are incredibly popular because they’re: Easy to deliver (email or download link) Cost-effective to create (sometimes even free) Scalable (sell them over and over again) In-demand in almost every niche—from wellness to finance to productivity If you’ve ever thought, “What are digital products, and how do people make money from them?”—you’re not alone. The answer is simple: you create or curate value once, and you can sell it repeatedly. That’s what makes selling digital products online one of the most beginner-friendly ways to build passive income and grow your brand. Even better? You don’t have to create your own from scratch. This post is packed with free digital product examples you can start using today. 1. That Girl Planner Download Here Tap into the viral “That Girl” lifestyle trend with this aesthetic digital planner designed for productivity, personal growth, and wellness. It’s sleek, minimalist, and Instagram-worthy—ideal for creators targeting Gen Z, lifestyle influencers, or anyone in the self-improvement niche. This planner makes a great freebie or lead magnet for your email list. You can also rebrand it and start selling digital products like this on Etsy, Gumroad, or your own site with minimal effort. 2. Semester Notion Planner Download Here If your audience includes students, productivity lovers, or Notion fans, this digital product is a goldmine. The Semester Notion Planner helps users manage classes, assignments, and deadlines all in one sleek digital dashboard. Notion templates are incredibly popular because they’re highly customizable and easy to sell or give away. This one can be used as a content upgrade in a blog post or YouTube video about student life, study tips, or digital organization. 3. Self-Care Planner Download Here Self-care isn’t just a trend—it’s a movement. This digital self-care planner helps users create routines that support their mental, emotional, and physical well-being. It includes space for daily reflections, mood tracking, wellness goals, and more. If your brand focuses on wellness, mindset, or holistic living, this planner makes an excellent free digital product or opt-in freebie. You can also pair it with blog content or videos about mental health, burnout, or daily routines. 4. 2025 Planner Download Here Everyone loves a fresh start—and this 2025 digital planner delivers. It comes packed with monthly and weekly layouts, goal-setting pages, habit trackers, and even budget tools. Whether your audience is made up of entrepreneurs, students, or busy moms, this planner is a versatile, high-value freebie. You can use it to drive email signups, increase blog traffic, or offer it as a bonus for a low-ticket course or coaching session. And if you’re looking for digital products to sell, planners like this are some of the top-performing products on Etsy and Shopify. 5. Cleaning Checklist Download Here Help your audience stay on top of household chores with this clear, easy-to-follow cleaning checklist. It breaks down tasks by daily, weekly, and monthly routines, making home organization less overwhelming and more achievable. This type of checklist is perfect for busy parents, minimalists, or anyone looking to simplify their cleaning habits. It’s a fantastic example of a digital product to sell or offer as a lead magnet in the lifestyle, home, or productivity niches. 6. Habit Tracker Download Here Building new habits can be tough—but this simple, printable habit tracker helps your audience stay accountable and motivated. Perfect for tracking everything from fitness goals to self-care routines, it’s a versatile tool with wide appeal. Habit trackers are some of the most popular digital products to sell because they offer ongoing value and encourage repeat use. They work well as freebies or as part of a larger digital product bundle. 7. Moving Checklist Download Here Moving can be stressful, but a clear, step-by-step moving checklist takes the chaos out of the process. This product breaks down everything from packing essentials to utility setups, making it an invaluable resource for anyone planning a move. This checklist works perfectly as a lead magnet for real estate agents, lifestyle bloggers, or anyone in the home organization space. It’s also a great example of a digital product to sell that offers practical value. 8. Self-Care Checklist Download Here Sometimes all your audience needs is a gentle reminder to slow down and take care of themselves. This simple yet effective self-care checklist encourages regular wellness habits and mindful moments throughout the day. Perfect for wellness coaches, mental health advocates, or lifestyle bloggers, this checklist is an easy digital product to sell or give away as a freebie to grow your email list. 9. Bible Character Study Download Here For faith-based audiences, this in-depth Bible character study offers meaningful insights into inspiring biblical figures. It’s perfect for devotionals, small groups, or personal reflection. This digital product works well for churches, faith bloggers, or spiritual coaches looking to offer valuable, downloadable content. It’s a thoughtful way to connect and provide lasting value. 10. Budget Tracker Download Here Money management is a top priority for many, and this budget tracker helps your audience monitor income, expenses, and savings goals in one easy-to-use digital tool. Ideal for personal finance bloggers, coaches, or lifestyle influencers, this tracker makes a practical freebie or a paid digital product. Budgeting tools are consistently in demand, making them a smart choice for selling digital products online. Why These Products Are Game-Changers Starting out
Winter Athleisure Outfits to Stay Cozy and Chic This Season
If you know me, you know I’m all about merging comfort with style, especially during the colder months. As the temperatures drop and the days get shorter, embracing the concept of deep winter outfits becomes essential. This season, I’m all about finding that perfect balance between warmth and fashion. When it comes to winter athleisure outfits, I love the challenge of looking chic while staying cozy, whether I’m heading out for a brisk walk, running errands, or simply enjoying a casual day at home. 5 Editorial Winter Athleisure Outfits To help you navigate your winter wardrobe, I’ve curated five standout looks that seamlessly blend comfort and style. These outfits help you feel fabulous while staying cozy. They are great for mixing and matching in your capsule wardrobe. Spoiler alert: these combinations are as comfy as they are stylish! 1. A Trench Coat + Hat + Sneakers For those crisp winter days, nothing beats the classic combo of a trench coat, a cozy hat, and sneakers. Start with a light neutral trench coat that adds a touch of sophistication to your look. Underneath, wear a fitted turtleneck in deep purple for a pop of color against the trench. A wool beanie in a matching tone keeps you warm while adding a stylish touch. Complete this outfit with your favorite white sneakers, which provide both comfort and a sporty vibe. For those crisp winter days, nothing beats the classic combo of a trench coat, a cozy hat, and sneakers. Here’s what you’ll need for this look: Light neutral trench coat Fitted turtleneck in deep purple Wool beanie in matching tone White sneakers This outfit is perfect for running errands or meeting friends for coffee—elegant yet effortlessly casual. 2. Puffer Jacket + Joggers + Chunky Sneakers Embrace the cold with a cozy puffer jacket that serves as your ultimate winter companion. Opt for a dark neutral puffer in black or charcoal, and pair it with high-waisted joggers in a bold emerald green for a fun pop of color. A basic white crew neck sweater underneath provides warmth without bulk. Finish off this look with chunky sneakers for an athleisure vibe that’s incredibly comfortable and trendy. Embrace the cold with a cozy puffer jacket that serves as your ultimate winter companion. Gather these pieces for a stylish athleisure look: Dark neutral puffer jacket (black or charcoal) High-waisted joggers in emerald green Basic white crew neck sweater Chunky sneakers This outfit is ideal for a casual day out or a cozy night in—just throw on some stylish hoop earrings, and you’re good to go! 3. Fleece Pullover + Leggings + Ankle Boots A cozy fleece pullover can elevate any winter outfit. Choose a true white or cream pullover to keep things fresh, and pair it with black high-waisted leggings for a sleek look. To add a bit of edge, opt for ankle boots with a chunky heel in a dark color. This creates a striking contrast against the softness of the fleece. If you want an extra layer, add a denim jacket or a lightweight bomber for warmth without compromising style. A cozy fleece pullover can elevate any winter outfit. For this look, you’ll need: True white or cream fleece pullover Black high-waisted leggings Chunky heel ankle boots Optional: Denim jacket or lightweight bomber This outfit is perfect for everything from brunch with friends to a cozy movie night at home. 4. Layered Hoodie + High-Waisted Trousers + Platform Sneakers Layering is key during the winter, and a long hoodie can be a stylish solution. Choose a dark winter palette hoodie—perhaps in a rich burgundy or deep navy—and layer it over a fitted long-sleeve top. Pair it with high-waisted trousers in a contrasting color like beige or taupe. To keep it casual, wear platform sneakers that add height while remaining comfortable. Layering is key during the winter, and a long hoodie can be a stylish solution. Here’s what to put together: Dark winter palette hoodie (burgundy or deep navy) Fitted long-sleeve top High-waisted trousers in beige or taupe Platform sneakers This winter athleisure outfit strikes the perfect balance between polished and relaxed, making it suitable for both casual meetings and after-work hangouts. 5. Oversized Sweater + Chunky Knit Scarf + High-Top Sneakers Finally, let’s talk about the oversized sweater look, a staple for any winter athleisure outfit. Pick a cozy oversized sweater in a cool dark shade like charcoal or navy. Layer a chunky knit scarf in a complementary color to add texture and warmth. Pair this with straight-leg jeans or leggings for ultimate comfort. High-top sneakers in a bright color can add a fun contrast and keep your feet warm. Finally, let’s talk about the oversized sweater look, a staple for any winter athleisure outfit. Gather these essentials: Cool dark oversized sweater (charcoal or navy) Chunky knit scarf in a complementary color Straight-leg jeans or leggings High-top sneakers in a bright color This outfit is ideal for those laid-back days when you want to look cute but feel relaxed, whether you’re running errands or enjoying a day in the park. Final Thoughts With these five winter athleisure outfits, you’ll be ready to tackle the season in style. Remember, winter athleisure is all about mixing comfort with flair, so don’t hesitate to experiment with different textures and colors. Embrace the chill, look good, and feel even better!
These Cool Deep Winter Outfits Will Keep You Warm and Stylish
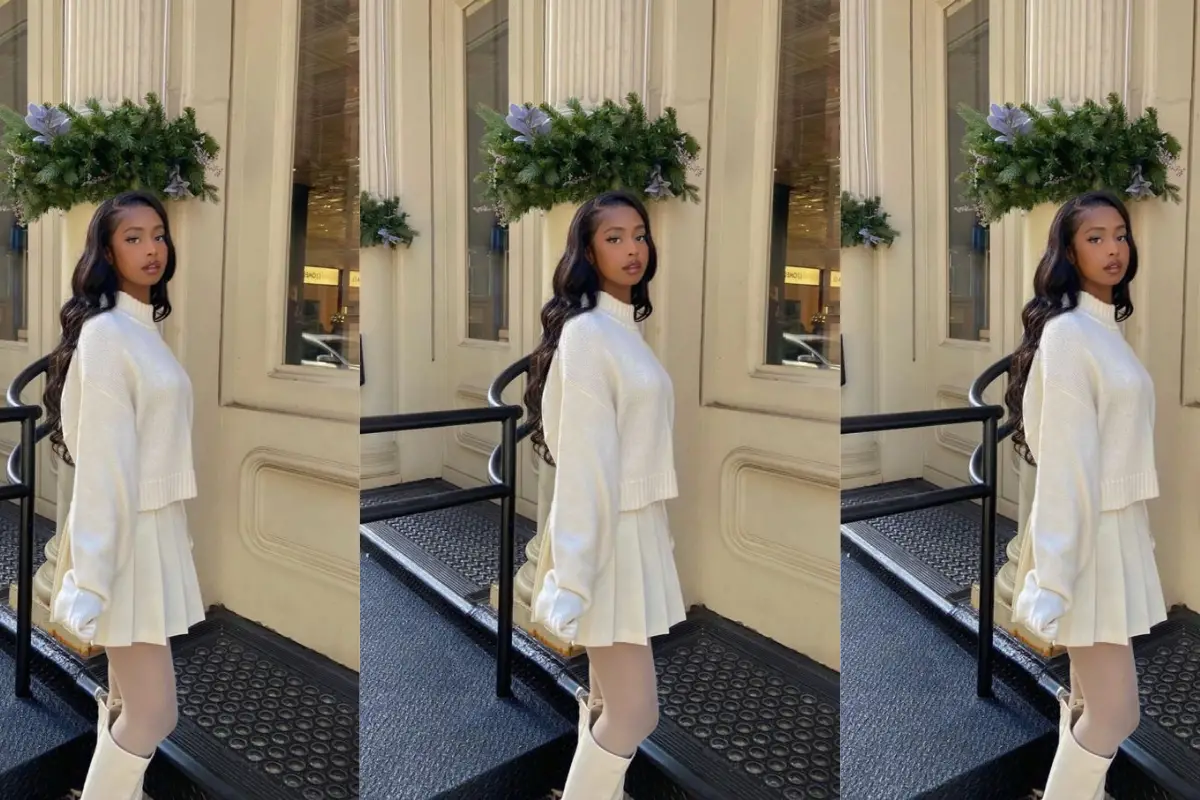
For Your Local It Girl, the products featured here are handpicked by our editorial team. If you decide to purchase through our links, we may earn a small commission, at no extra cost to you. We only recommend items we truly love and trust. For me, winter doesn’t truly begin until I’m bundled up in my favorite oversized coat, slipping into my go-to boots, and sipping on a piping hot coffee. As the temperature drops, and the days get shorter, deep winter outfits become all about comfort, warmth, and style. Layering up is essential, but that doesn’t mean you have to sacrifice looking chic. I love winter fashion because it allows us to mix textures, experiment with layers, and bring out cozy staples. Whether you’re braving icy winds or trying to stay toasty on a snowy day, your wardrobe should balance practicality with style. The challenge? Finding ways to make your cold-weather wardrobe feel fresh as the winter months wear on. If you’re like me, you want outfits that are not only functional but also versatile enough to mix and match throughout the season. With that in mind, here are five deep winter outfit ideas that are both practical and stylish, perfect for keeping you warm all season long. 5 Editorial Deep Winter Outfit Ideas Ready for cozy comfort this winter? Let’s explore some practical and stylish combinations! 1. Blue Acid-Wash Jeans and a Knitted Cardigan View this post on Instagram A post shared by Rohima 🖤 23 🇧🇩 (@rohiimaaa) There’s something classic yet refreshing about a pair of blue acid-wash jeans, and in winter, they pair perfectly with a long-knitted cardigan. I love layering a plain white bodysuit underneath to add warmth without bulk. This cozy yet casual ensemble works perfectly for mild winter days. To complete the look, throw on white sneakers and a white shoulder bag for a clean, minimalist vibe. This is the perfect outfit for when you want to stay comfortable but still look effortlessly put together. SHEIN Honda Fit TAKE A LOOK SHEIN Honda Fit TAKE A LOOK SHEIN Honda Fit TAKE A LOOK SHEIN Honda Fit TAKE A LOOK 2. Dark Denim Mom Jeans and a Fur Jacket When it’s freezing outside, a good fur jacket can make all the difference. Pairing a luxe fur jacket with dark denim mom jeans strikes the perfect balance between comfort and high fashion. For a touch of street style, I like to add a fur bag and sneakers. Finish the look with a cute cap to keep your head warm while adding a trendy twist. This look is perfect for city strolls or coffee dates in the chilly winter air. SHEIN Honda Fit TAKE A LOOK SHEIN Honda Fit TAKE A LOOK SHEIN Honda Fit TAKE A LOOK SHEIN Honda Fit TAKE A LOOK 3. Dark Hoodie, Cargo Pants, and Fuzzy Winter Shoes For a more laid-back winter day, nothing beats a comfortable hoodie and cargo pants combination. The grey cargo pants bring a utilitarian feel, while the dark hoodie keeps the look relaxed and cozy. To keep things, winter appropriate, I finish this outfit with warm brown fuzzy shoes and a satchel. This outfit is perfect for casual days when you’re running errands or meeting friends for a laid-back hangout, offering both warmth and a cool, street-style vibe. SHEIN Honda Fit TAKE A LOOK SHEIN Honda Fit TAKE A LOOK SHEIN Honda Fit TAKE A LOOK SHEIN Honda Fit TAKE A LOOK 4. Black Knee-High Boots, Asymmetrical Plaid Skirt, and Brown Trench Coat For those days when I want to dress up without sacrificing warmth, I turn to an asymmetrical plaid skirt paired with black knee-high boots. The combination feels both elegant and functional, especially when topped with a white knitted sweater and a brown trench coat. The boots offer extra coverage, while the coat adds a layer of sophistication. This ensemble is ideal for events, date nights, or even a casual office setting when you need to be both stylish and prepared for the cold. SHEIN Honda Fit TAKE A LOOK SHEIN Honda Fit TAKE A LOOK SHEIN Honda Fit TAKE A LOOK SHEIN Honda Fit TAKE A LOOK 5. White Puffy Jacket, Pink Scarf, and White Pants Monochrome looks have a way of standing out in the winter, especially when done in light colors. A white puffy jacket paired with white pants is a bold yet fresh take on deep winter fashion. To keep it from feeling too stark, I like to add a pop of color with a pink scarf and finish the look with warm, fuzzy brown shoes. This is the perfect outfit for snowy days when you want to stay cozy and fashionable without getting lost in a sea of dark tones. SHEIN Honda Fit TAKE A LOOK SHEIN Honda Fit TAKE A LOOK SHEIN Honda Fit TAKE A LOOK SHEIN Honda Fit TAKE A LOOK Winter can sometimes feel like a style rut, but the right deep winter outfits can make all the difference. By layering thoughtfully, mixing textures, and playing with colors, you can create looks that are not only functional but also fashion-forward. Whether you’re braving the snow or simply enjoying a cold-weather coffee run, these outfits will keep you warm and stylish all season long.

200 Lifestyle Blog Post Ideas
Starting a lifestyle blog is an exciting journey, but coming up with content ideas can sometimes be challenging. To help you get started, here are 200 lifestyle blog post ideas organized into 10 different categories. Whether you’re writing about fashion, health, or self-improvement, these ideas will inspire and guide you as you create engaging and meaningful content for your readers. 1. Fashion and Style How to Build a Capsule Wardrobe (Example)Tips on creating a minimal yet versatile wardrobe. Seasonal Fashion EssentialsMust-have fashion items for each season. Thrift Store Finds and How to Style ThemCreative outfits on a budget. Fashion Trends to Look Out For This YearHighlight upcoming trends in the fashion world. How to Choose the Right AccessoriesComplementing your outfits with the perfect accessories. Outfit Ideas for Every OccasionLooks for weddings, parties, or casual outings. Sustainable Fashion: Where to StartA beginner’s guide to eco-friendly clothing. How to Style the Same Piece in Multiple WaysMaking the most of your wardrobe. Dressing for Your Body TypeTips to enhance your best features. How to Mix Patterns Like a ProStyling bold and fun patterns. Favorite Online Boutiques for Unique PiecesDiscovering hidden gems on the internet. Wardrobe Organization Tips for Small SpacesHow to organize clothing in tight areas. How to Stay Stylish on a BudgetMoney-saving tips without sacrificing style. Best Fashion Apps You Need to Know AboutTechnology that makes fashion easier. How to Choose the Right Footwear for Any OutfitFinding the perfect shoes for any look. Fashion Mistakes to AvoidCommon pitfalls and how to fix them. How to Layer Clothes Like a FashionistaMastering layering for different seasons. The History of Iconic Fashion BrandsA look into well-known fashion houses. Personal Style Evolution: From Then to NowHow your style has changed over the years. A Week in Outfits: Documenting Your StyleA visual diary of what you wear in a week. 2. Health and Wellness Morning Routine for a Productive DayHow to start your day off right. Healthy Smoothie Recipes to Boost EnergyDelicious and nutritious drink ideas. Yoga for Beginners: Simple Poses to StartEasy yoga moves for flexibility and relaxation. How to Get Better Sleep NaturallyTips for improving your sleep quality. Self-Care Sunday IdeasActivities to recharge and refresh. How to Manage Stress During Busy TimesTechniques to stay calm under pressure. The Benefits of Meditation and How to StartA guide to meditation for beginners. 10 Ways to Boost Your Immune SystemNatural ways to support your body’s defenses. The Importance of Staying HydratedHow water impacts your health. How to Stay Fit While Working from HomeHome workout routines for busy individuals. Meal Prep Ideas for Healthy EatingTips on planning and preparing nutritious meals. How to Break Bad Habits and Create Good OnesBuilding a healthier lifestyle through better habits. Mental Health Awareness: Coping with AnxietyResources and tips for managing anxiety. Detox Your Body NaturallyNatural methods to cleanse and refresh. How to Practice Gratitude DailyImproving mental well-being through gratitude. Best Supplements for Overall WellnessA guide to essential vitamins and minerals. The Importance of Stretching Every DayWhy stretching is essential for flexibility and mobility. How to Avoid Burnout in Your Daily LifePreventing physical and mental exhaustion. How to Make Your Own Wellness JournalDocumenting your health and wellness journey. The Benefits of Outdoor ExerciseWhy you should take your workout outside. 3. Personal Development How to Set and Achieve Your GoalsTips on making and sticking to your goals. The Importance of a Growth MindsetHow to embrace change and growth in your life. Daily Habits of Successful PeopleInspiring habits you can incorporate into your day. How to Build Self-ConfidenceStrategies to boost self-esteem. Overcoming Procrastination: Actionable StepsBreaking the habit of putting things off. How to Stay Motivated When You Feel StuckTips for regaining your drive. Public Speaking Tips for BeginnersHow to speak confidently in front of others. How to Master Time ManagementTechniques for organizing your day effectively. The Power of Positive ThinkingHow to cultivate a positive mindset. How to Create a Vision Board That WorksTurning your dreams into reality with visualization. Steps to Take to Build a Personal BrandCreating a unique identity both online and offline. How to Build a Strong Work EthicDeveloping discipline and dedication in your work. Embracing Minimalism for a Simpler LifeTips for decluttering your mind and space. How to Overcome Fear and Take RisksBreaking out of your comfort zone. Books That Will Change Your LifeMust-read self-improvement books. How to Develop Emotional IntelligenceUnderstanding and managing your emotions. Tips for Effective CommunicationHow to improve your relationships through communication. How to Stay Organized in a Busy WorldOrganization hacks to manage your time and space. The Importance of Lifelong LearningNever stop growing and learning new things. How to Cultivate Gratitude in Your LifeDaily practices to appreciate life more fully. 4. Home and Decor Budget-Friendly Home Decor HacksTransforming your space without breaking the bank. How to Decorate a Small SpaceMaximizing every square inch in tiny homes. DIY Wall Art IdeasAffordable and creative ways to decorate your walls. How to Style a Bookshelf Like a ProMaking your shelves both functional and decorative. Tips for Organizing a Home OfficeCreating an inspiring and clutter-free workspace. How to Use Color in Your HomeChoosing the right color palette for each room. A Guide to Feng Shui for BeginnersBringing balance and harmony into your home. How to Decorate with PlantsIncorporating greenery into your living space. How to Arrange Furniture for Optimal FlowDesigning your space with functionality in mind. The Benefits of Minimalist Home DesignSimplifying your home to reduce stress. Seasonal Decor Ideas for Every OccasionDecorating your home for holidays and special events. How to Create a Cozy Reading NookMaking a space dedicated to relaxation and books. The Best Lighting Tips for Every RoomHow lighting can change the mood of your space. How to Choose the Right Rugs for Your HomeTips on selecting the perfect rugs for each area. How to Decorate a Rental SpaceTips for making a temporary home feel permanent. Creative Storage Solutions for Small SpacesClever ways to keep your home organized. How to Create a Zen-Inspired SpaceDesigning a peaceful retreat at home. Choosing the Right Window TreatmentsHow to pick curtains and blinds that